ThingsBoard provides a powerful REST API that allows you to manage all platform entities, perform integrations, automate device provisioning, and build custom applications. To simplify API exploration and testing, ThingsBoard includes built-in interactive documentation powered by Swagger UI.
Swagger UI
Swagger UI is an interactive tool that lets you:
- browse all available REST API endpoints
- inspect request and response schemas
- test API calls directly in the browser
- authenticate and run API requests as a specific user
This makes it ideal for development, debugging, and API exploration.
Where to find Swagger UI?
Every ThingsBoard instance hosts its own Swagger UI page at:
1
http://$THINGSBOARD_HOST:PORT/swagger-ui.html
* Replace $THINGSBOARD_HOST:PORT with the address of your ThingsBoard deployment.
Authentication in Swagger UI
Automatic authentication
If you are already logged in through the main ThingsBoard UI, Swagger UI automatically uses your authenticated session.
Manual authentication
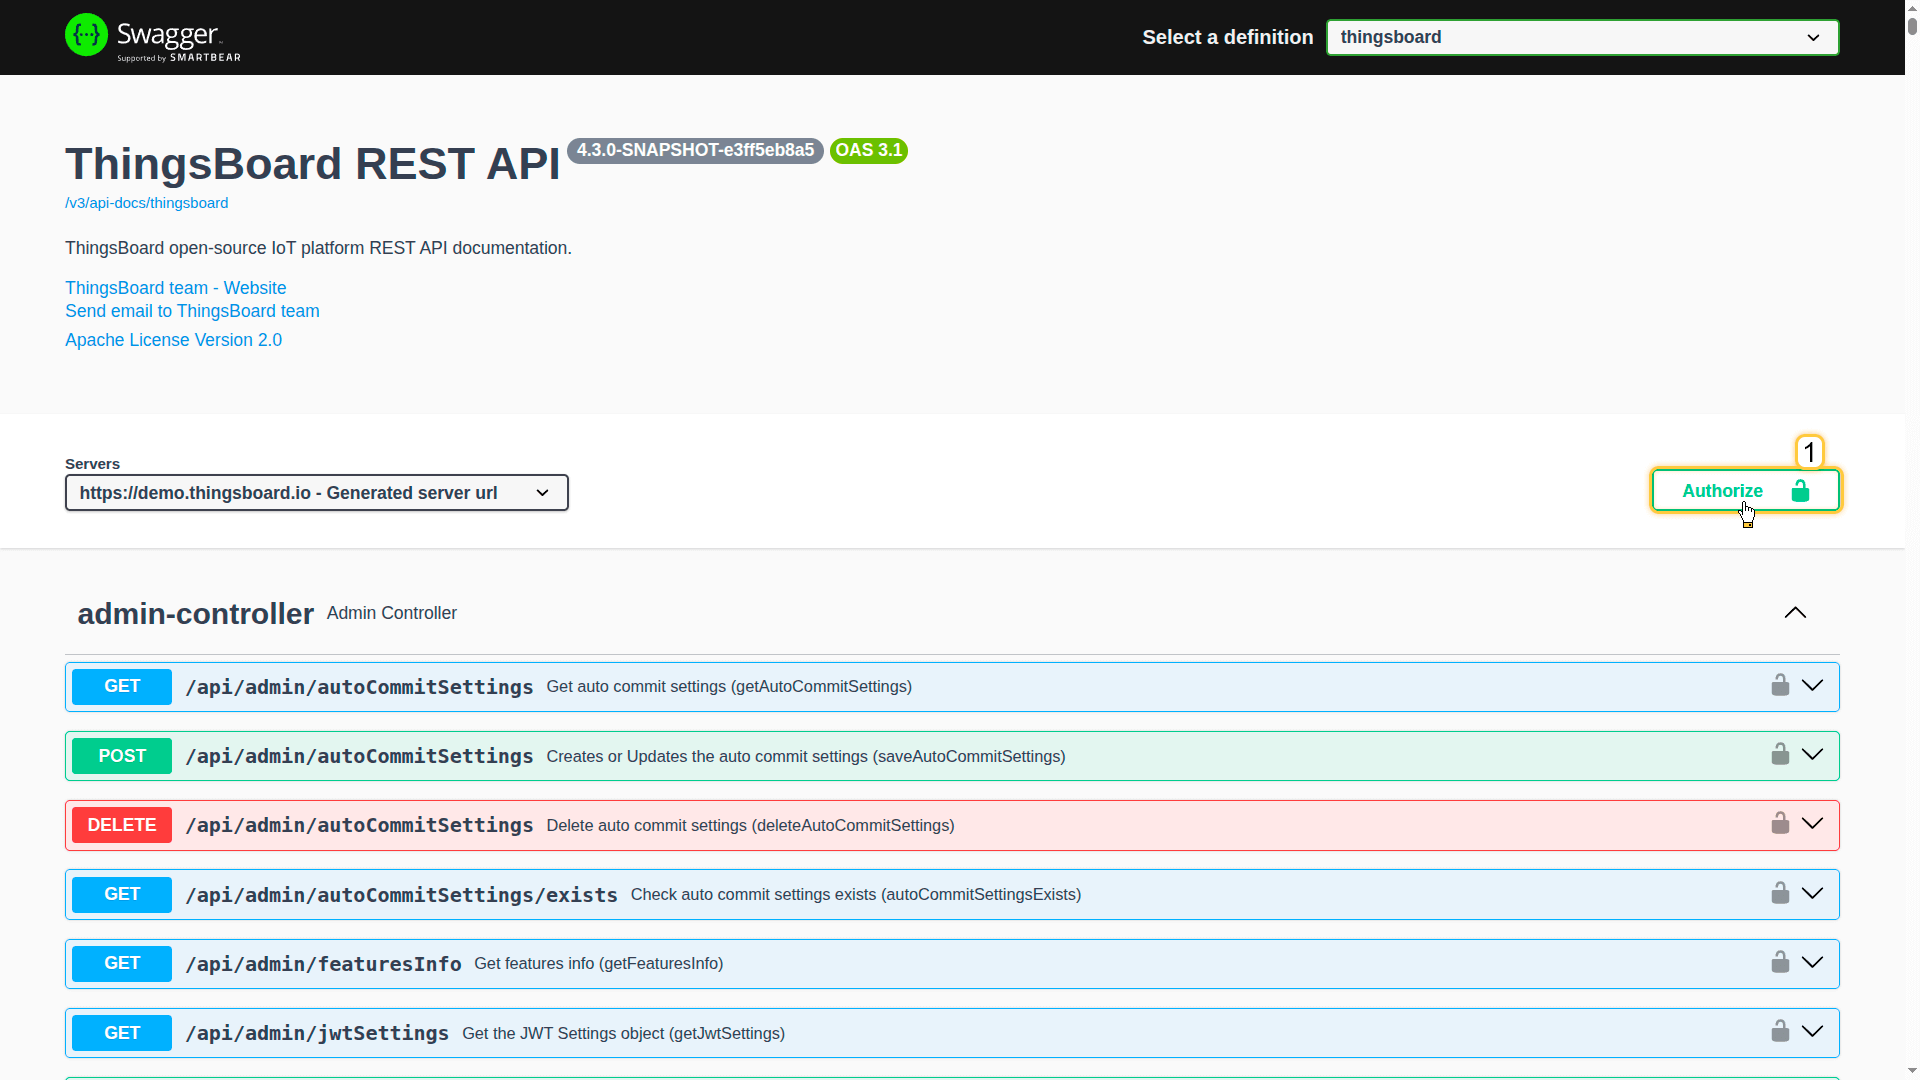
You can authenticate or authorize as a different user using the Authorize button in the top-right corner of Swagger UI.
Steps:
- Open Swagger UI
- Click Authorize
- Enter your username and password,
orpaste your API key In the API key form (apiKey) section. - Click Authorize
Note: Only one authentication method should be used at a time.
If both are authorized, JWT takes priority.
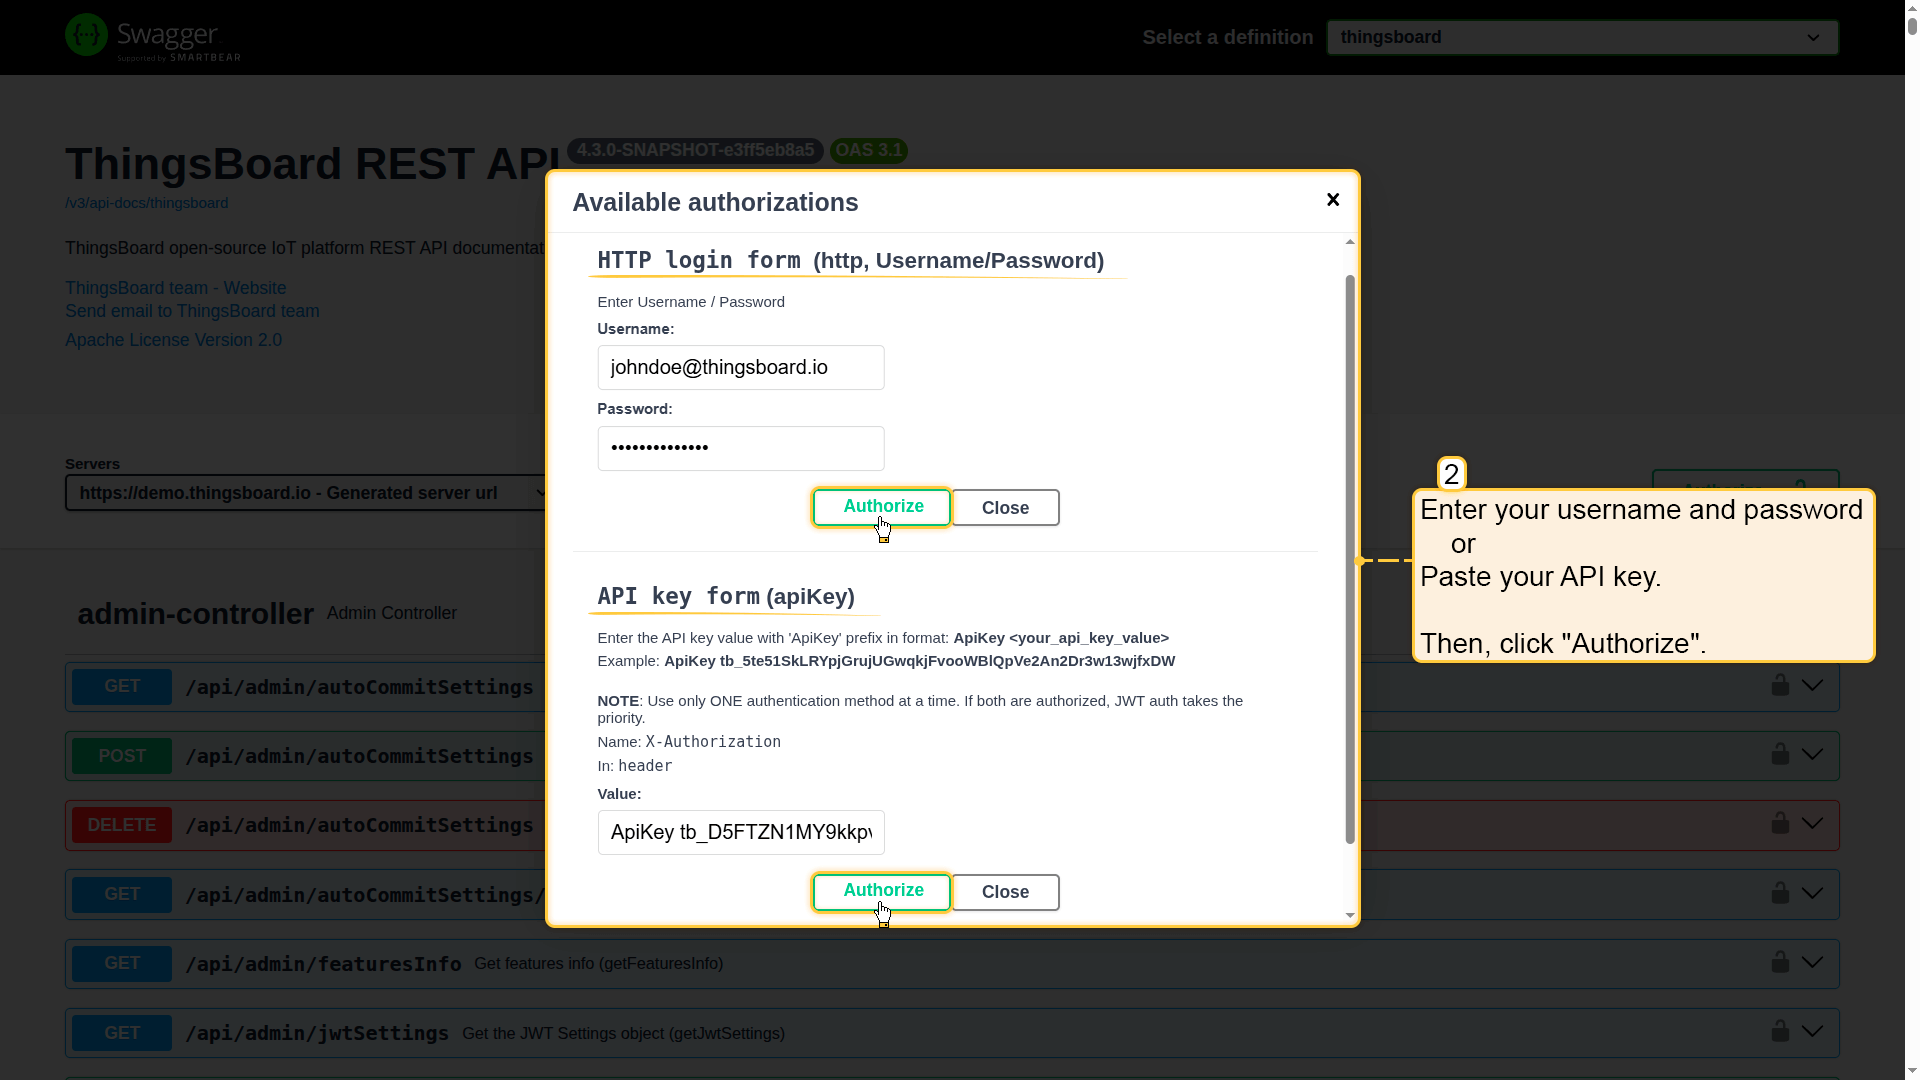
Then, click Authorize.
API key authentication
| Available since TB Version 4.3 |
API keys provide a simpler, automation-friendly alternative to JWT authentication.
- No login required: You don't need to exchange passwords or manage token refresh loops
- Long-lived: They stay active indefinitely or until the expiration date you choose
- Revocable: You can easily disable a specific key
Note: Use the API keys tab in the ThingsBoard UI to create and manage them. For more details, see the full documentation.
Using API keys
To authenticate via the API key, include it in the X-Authorization header with the “ApiKey” prefix:
1
X-Authorization: ApiKey $YOUR_API_KEY_VALUE
* Replace $YOUR_API_KEY_VALUE with the API key.
Important: API keys should only be used over HTTPS.
Example (curl)
1
2
3
curl -X GET --header 'Accept: application/json' \
            --header 'X-Authorization: ApiKey $YOUR_API_KEY_VALUE' \
            'http://$THINGSBOARD_URL/api/auth/user'
JWT authentication (deprecated)
ThingsBoard uses JWT tokens to authenticate API requests.
When you log in, your username and password are exchanged for two tokens:
- Access Token (JWT) - A short-lived token used for API requests.
- Refresh Token - When the Access Token expires, the Refresh Token allows obtaining a new Access Token without re-authentication.
Default expiration times
- Access Token is valid for 2.5 hours.
- Refresh Token is valid for 1 week.
Expiration times are configurable in system settings:
- JWT_TOKEN_EXPIRATION_TIME
- JWT_REFRESH_TOKEN_EXPIRATION_TIME
How to obtain a JWT token?
To obtain a JWT token for the user “tenant@thingsboard.org” with password “tenant” on “$THINGSBOARD_URL” (actual ThingsBoard server address), execute the following command:
1
2
3
4
curl -X POST --header 'Content-Type: application/json' \
             --header 'Accept: application/json' \
             -d '{"username":"tenant@thingsboard.org", "password":"tenant"}' \
             'http://$THINGSBOARD_URL/api/auth/login'
Response:
1
{"token":"$YOUR_JWT_TOKEN", "refreshToken":"$YOUR_JWT_REFRESH_TOKEN"}
Once authenticated, use the obtained JWT token in the X-Authorization header for all API requests:
1
X-Authorization: Bearer $YOUR_JWT_TOKEN
Additional tools
For easier integration with the ThingsBoard API, you can use ThingsBoard team client libraries:
- Java REST API Client – client library written in Java to simplify consumption of the REST API.
- Python REST API Client – client library written in Python to simplify the consumption of the REST API.
These clients allow you to create devices, assets, users, and other entities, as well as manage their relationships within ThingsBoard.