- How to create, edit, and delete asset
- Make asset public
- Assigning asset to customer
- Asset details
- Managing asset relations. How to add, view, edit, delete
- Next steps
- Your feedback
Asset is an abstract entity in the IoT system of ThingsBoard that represents any physical object, space, or organizational unit. Examples include a building, room, production area, field, streetlight, substation, or vehicle.
Key characteristics of an asset:
- Does not generate telemetry on its own but can be associated with devices that do.
- Can have its own attributes, such as location, type, or responsible personnel.
- Used for grouping devices and other entities.
- Can be part of a hierarchy, e.g., Substation ⟶ Line ⟶ Streetlight.
- Participates in ThingsBoard business logic, such as rule chains, alarms, and dashboards.
Assets help logically and efficiently structure your IoT project, making it easier to manage and scale.
ThingsBoard supports asset management functions via both the web UI and the REST API.
Practical video course 🎥
Watch this practical video course to learn how to configure and manage ThingsBoard dashboards, resources, and devices, and how to use them in real-world scenarios.
How to create, edit, and delete asset
Tenant administrators and users with appropriate permissions can create, edit, or delete assets in ThingsBoard.
Creating asset
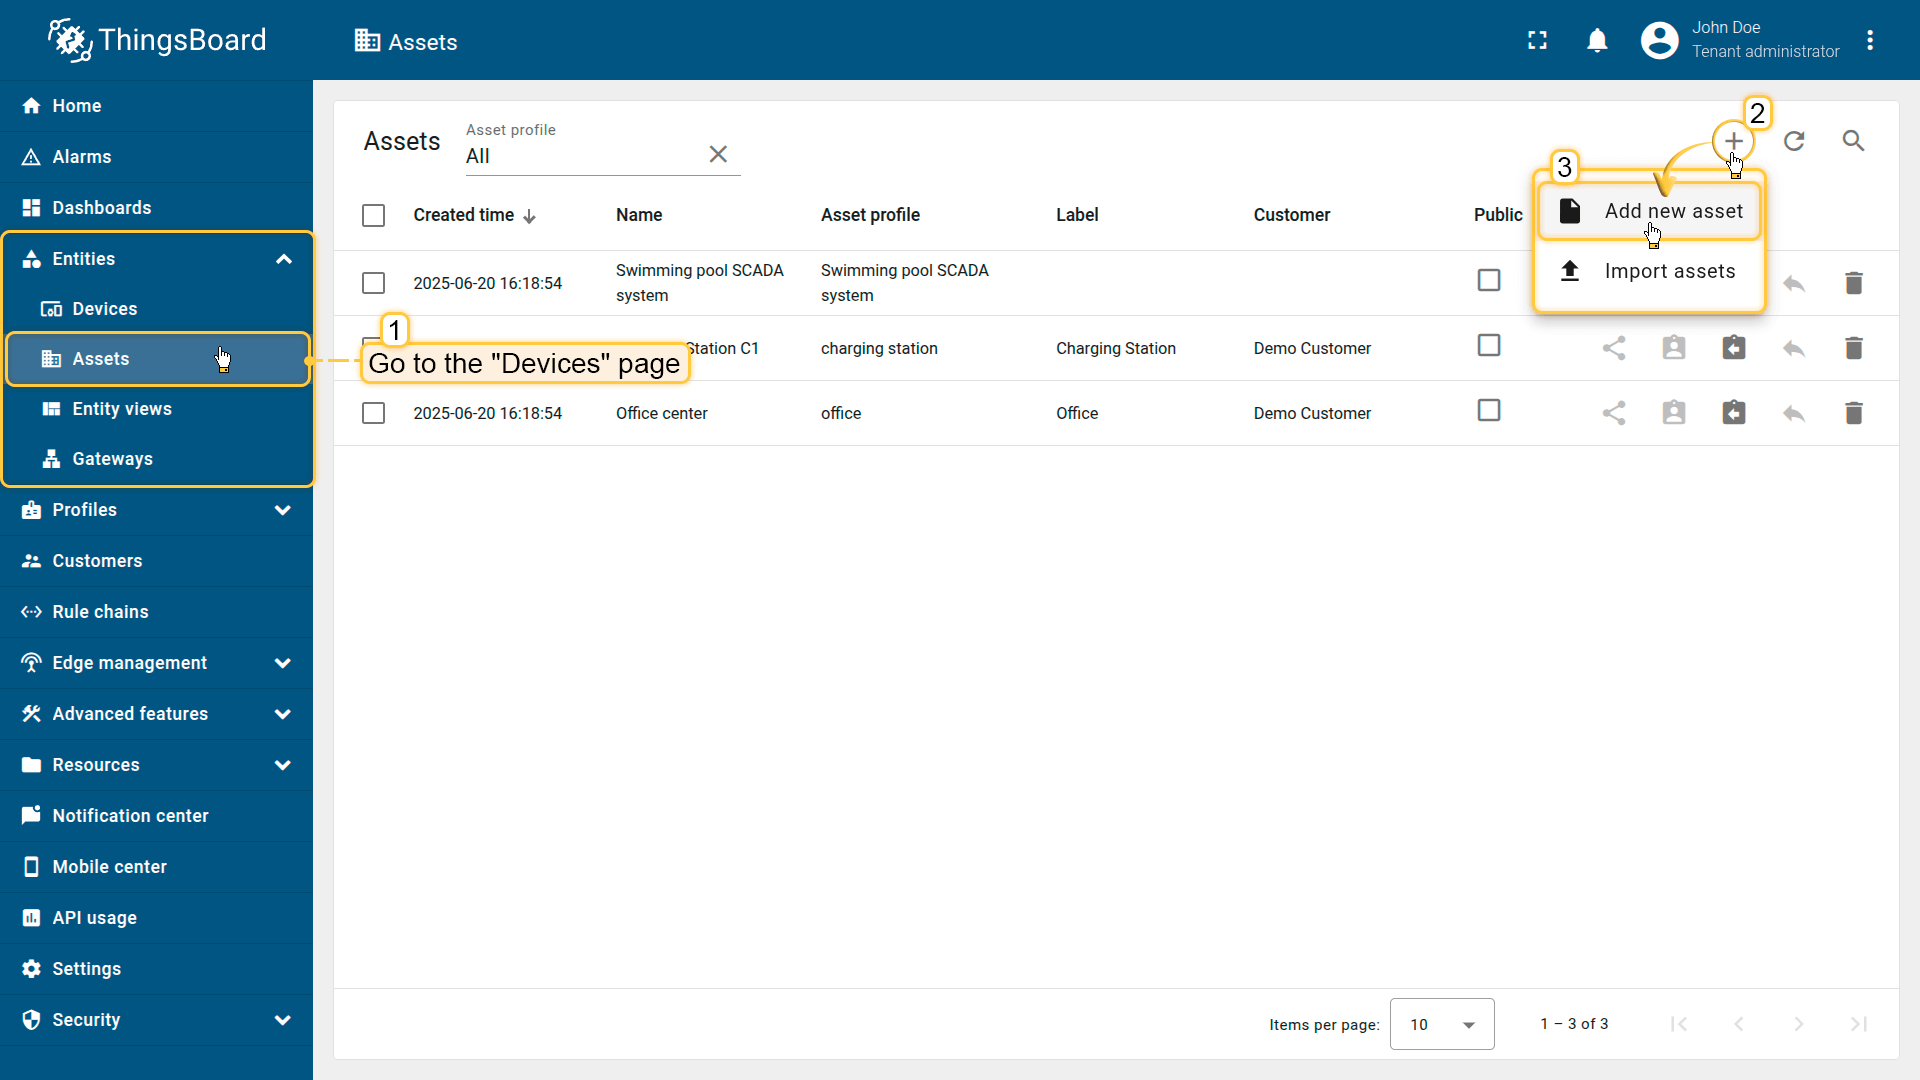
To create a new asset:
- Navigate to Entities ⟶ Assets.
- Click the “+” icon in the upper-right corner and select “Add new asset” from drop-down menu.
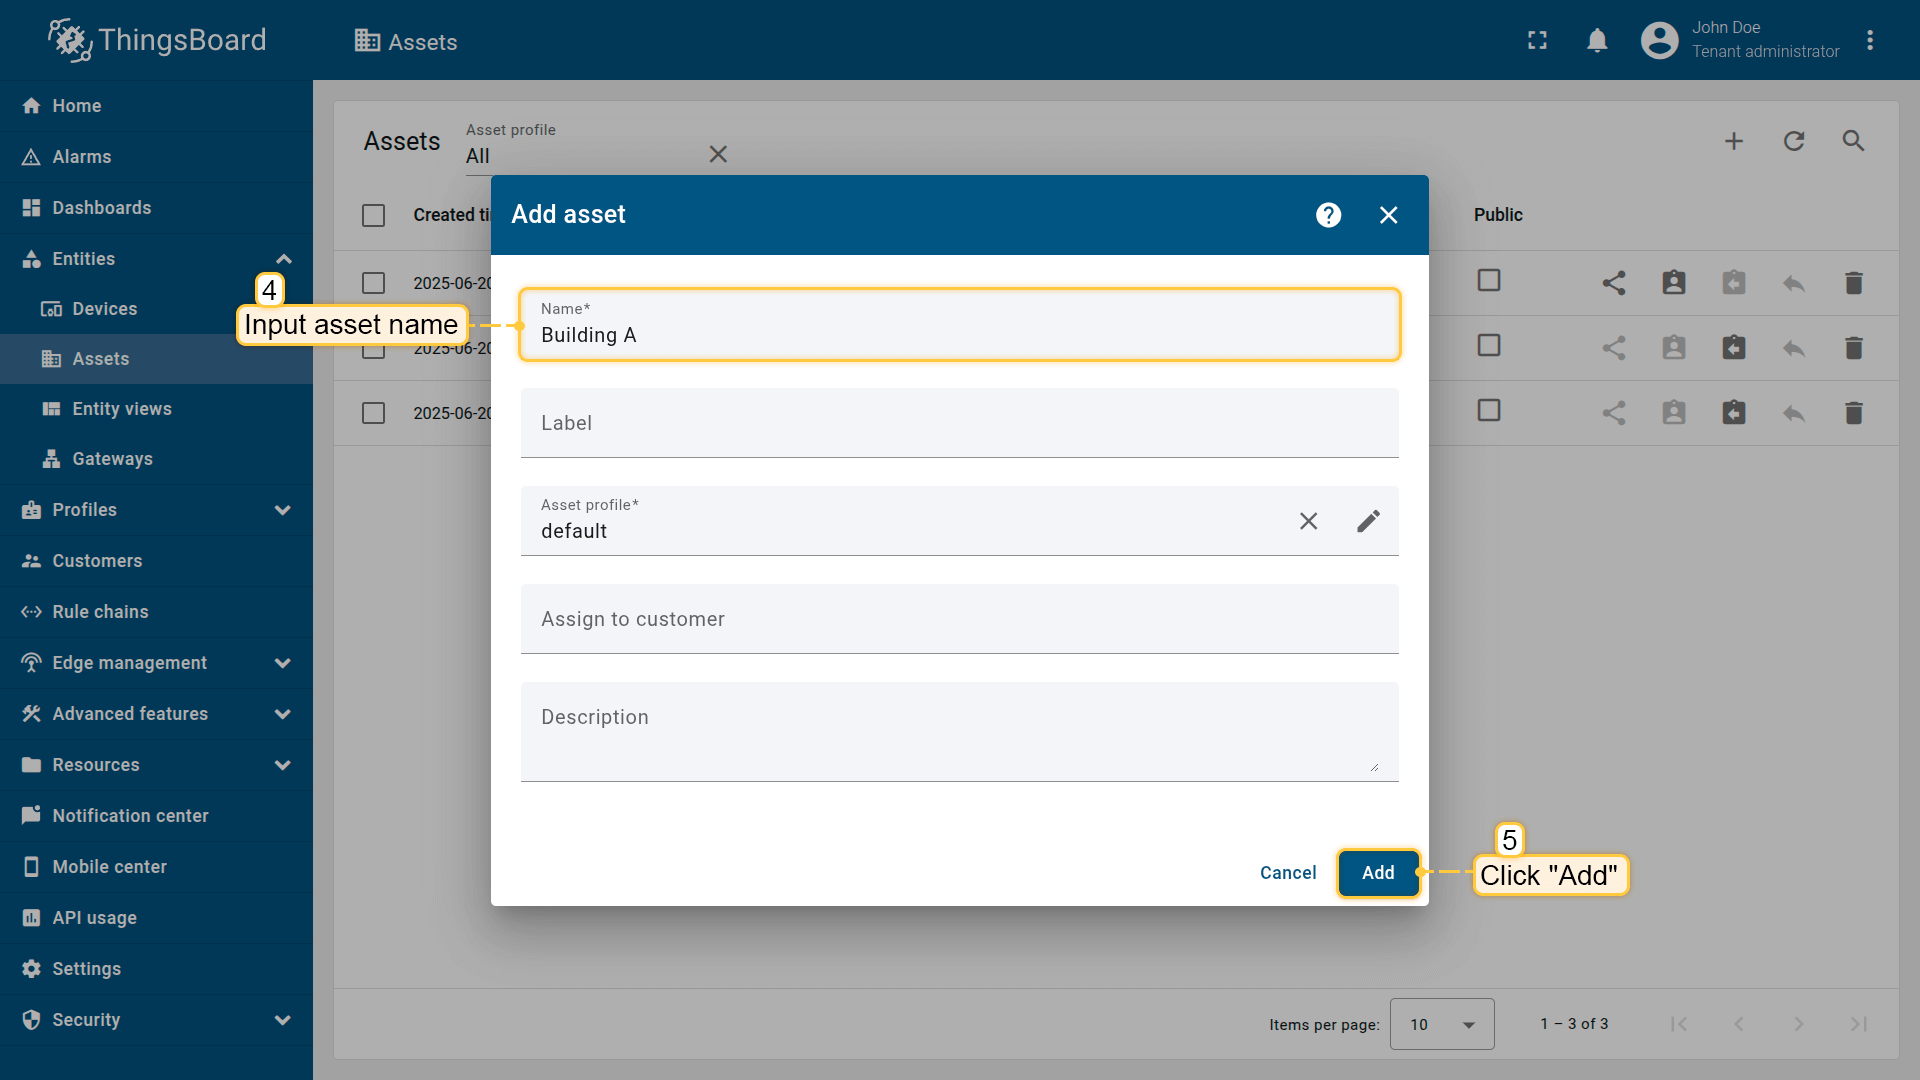
- In the asset creation form, fill in the required fields:
- Name – a unique name for the asset.
- Asset profile – by default, the profile is set to “default”, but you can choose a different profile if needed.
- Optional fields such as Label or Description can be filled in if needed.
- Click “Add”.
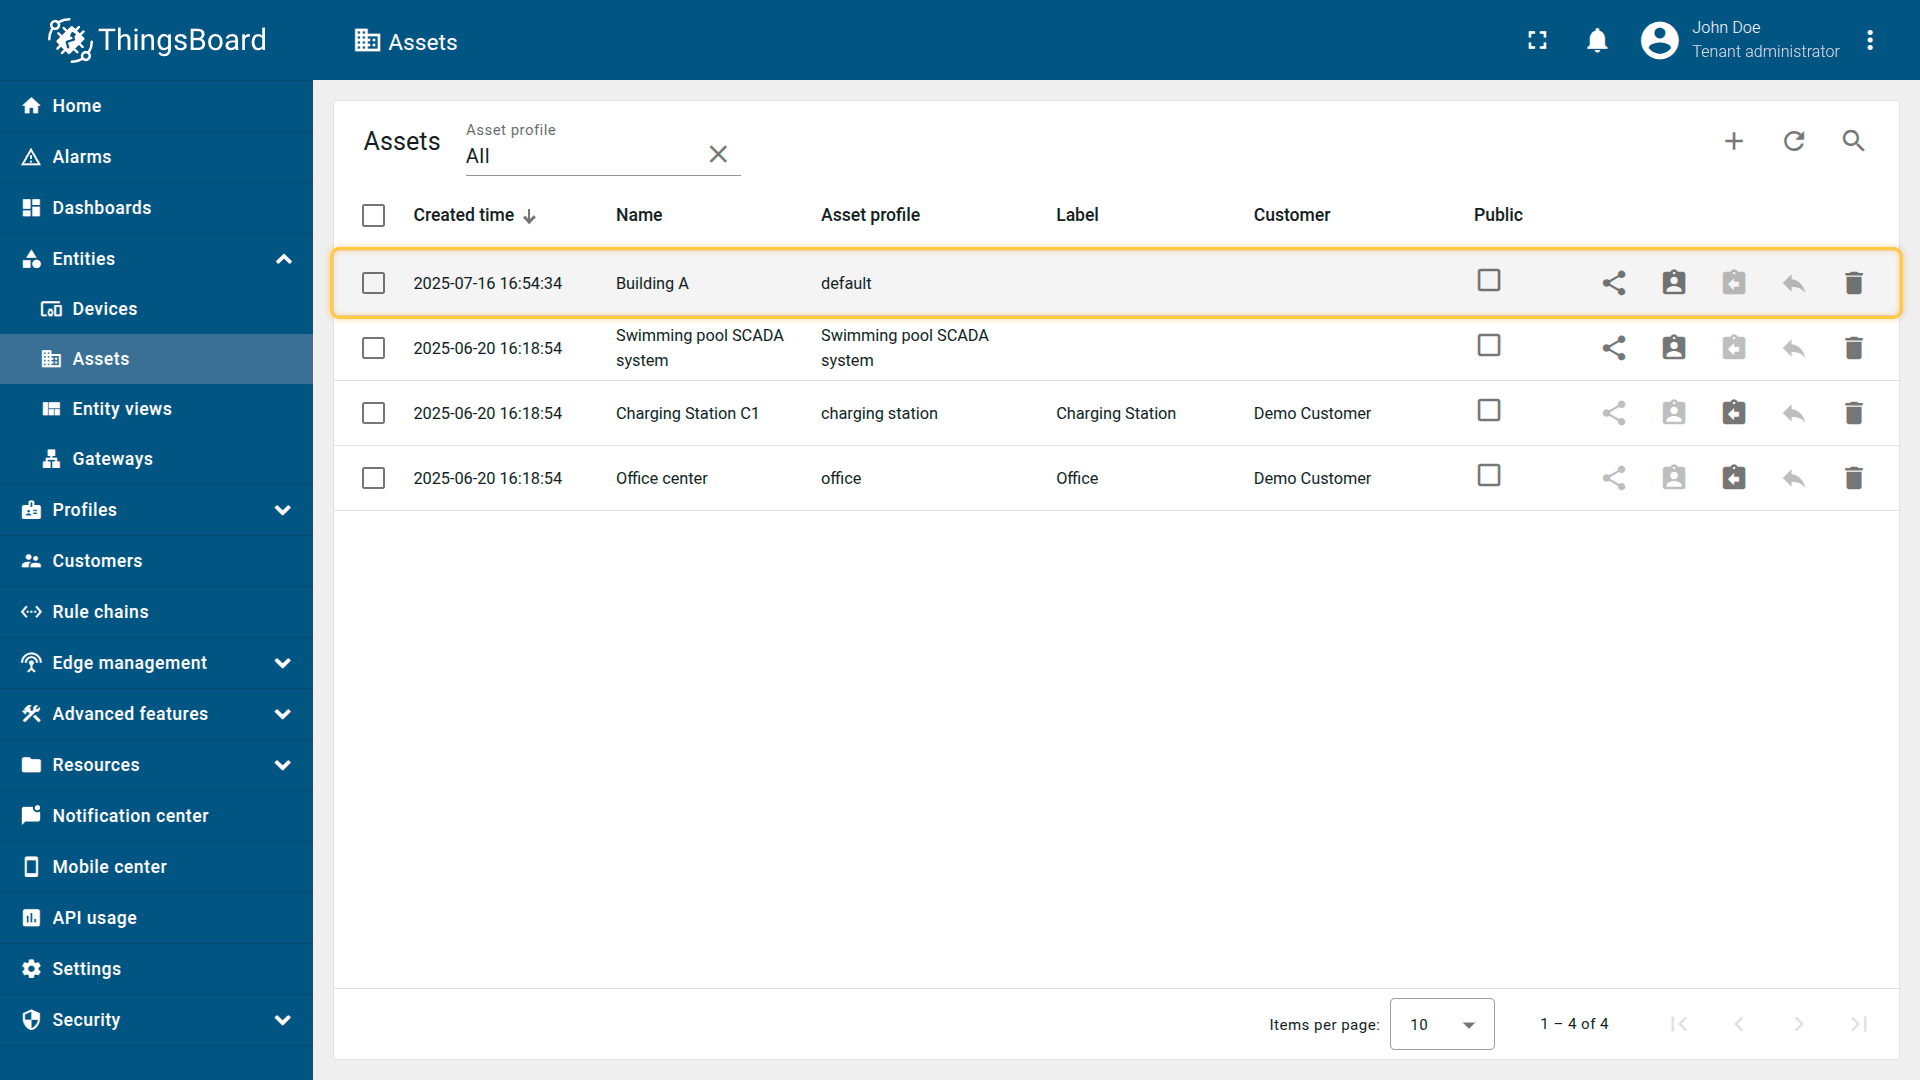
The asset has been successfully created and is now available in the list.
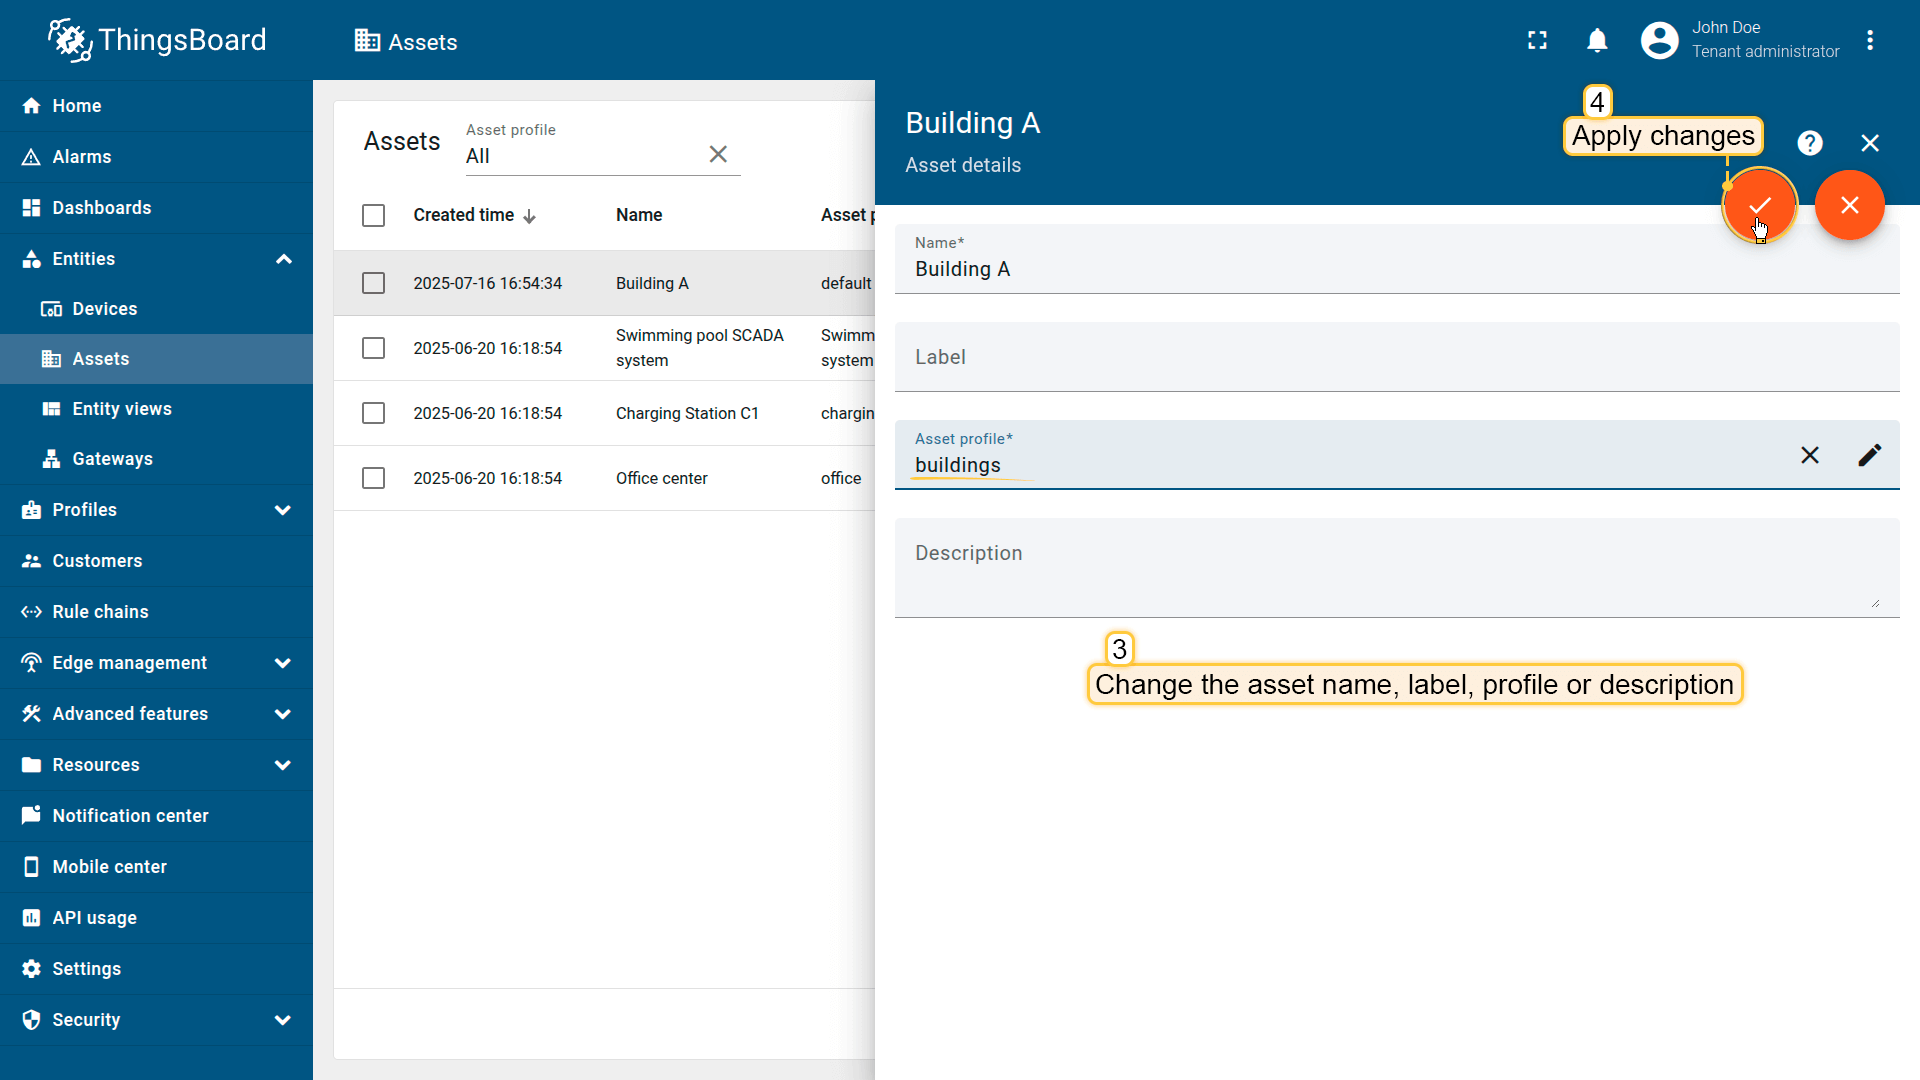
Editing asset
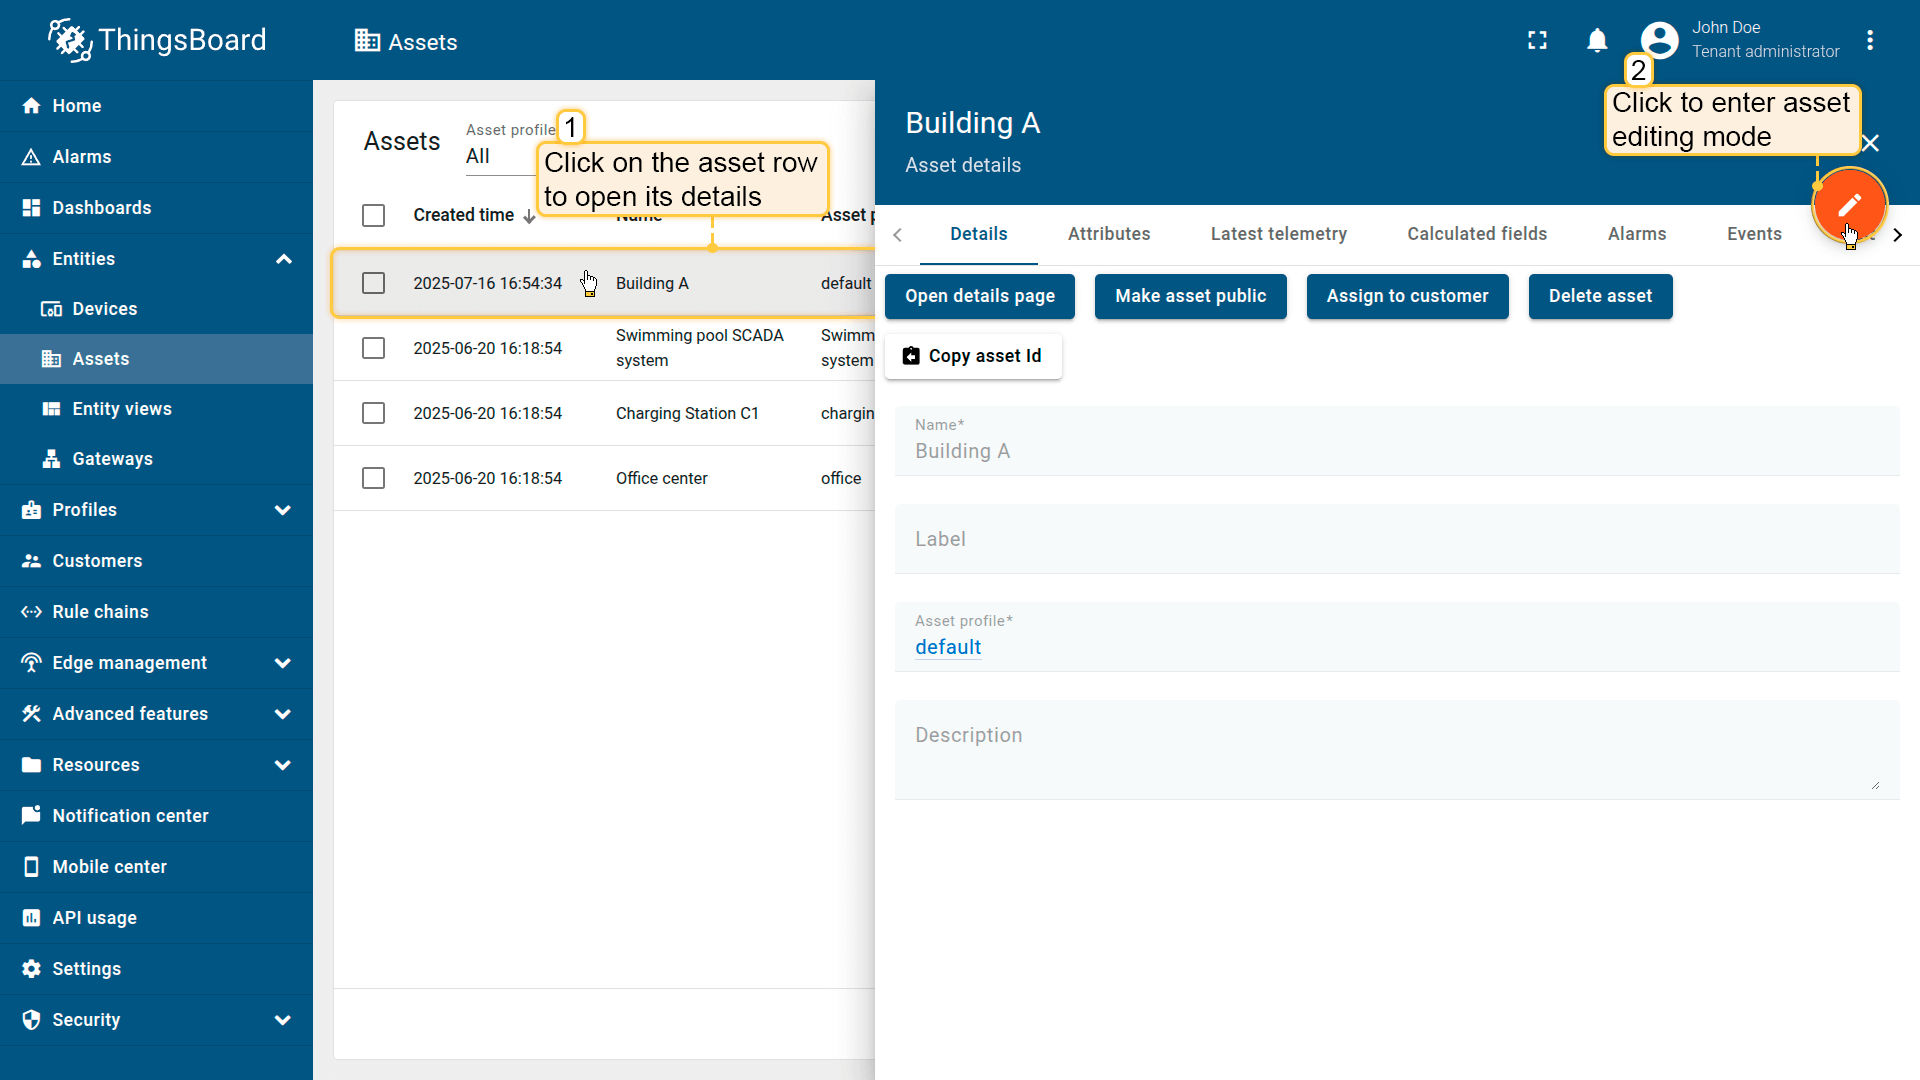
To edit an existing asset:
- In the Assets list, locate and click on the desired asset.
- Click the “pencil” (✏️ Edit) icon on the right.
- In the edit window, you can modify the following fields:
- Name
- Label
- Asset profile
- Description
- After making the necessary changes, click “Apply changes” to save.
Deleting asset
To delete an asset:
- Find the asset in the list and click the "trash bin" icon next to it.
- Confirm the deletion in the popup dialog.
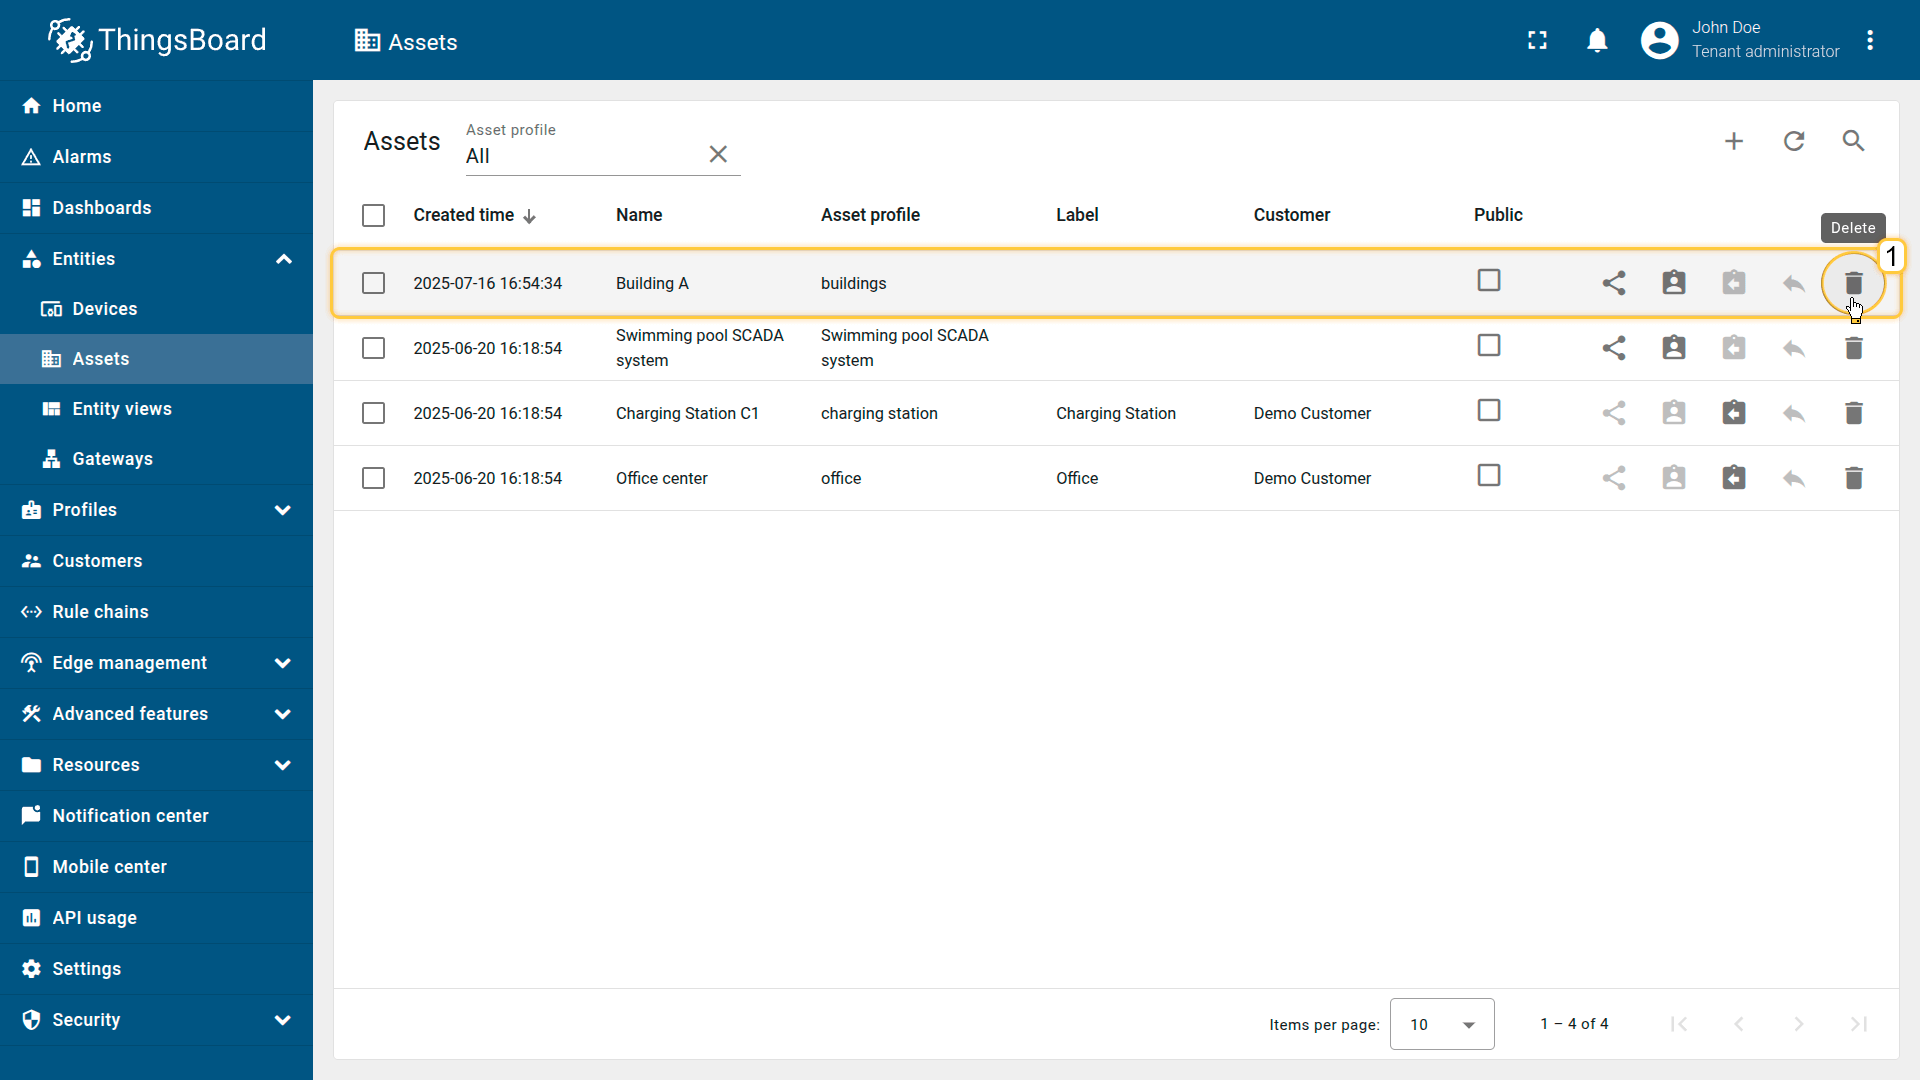
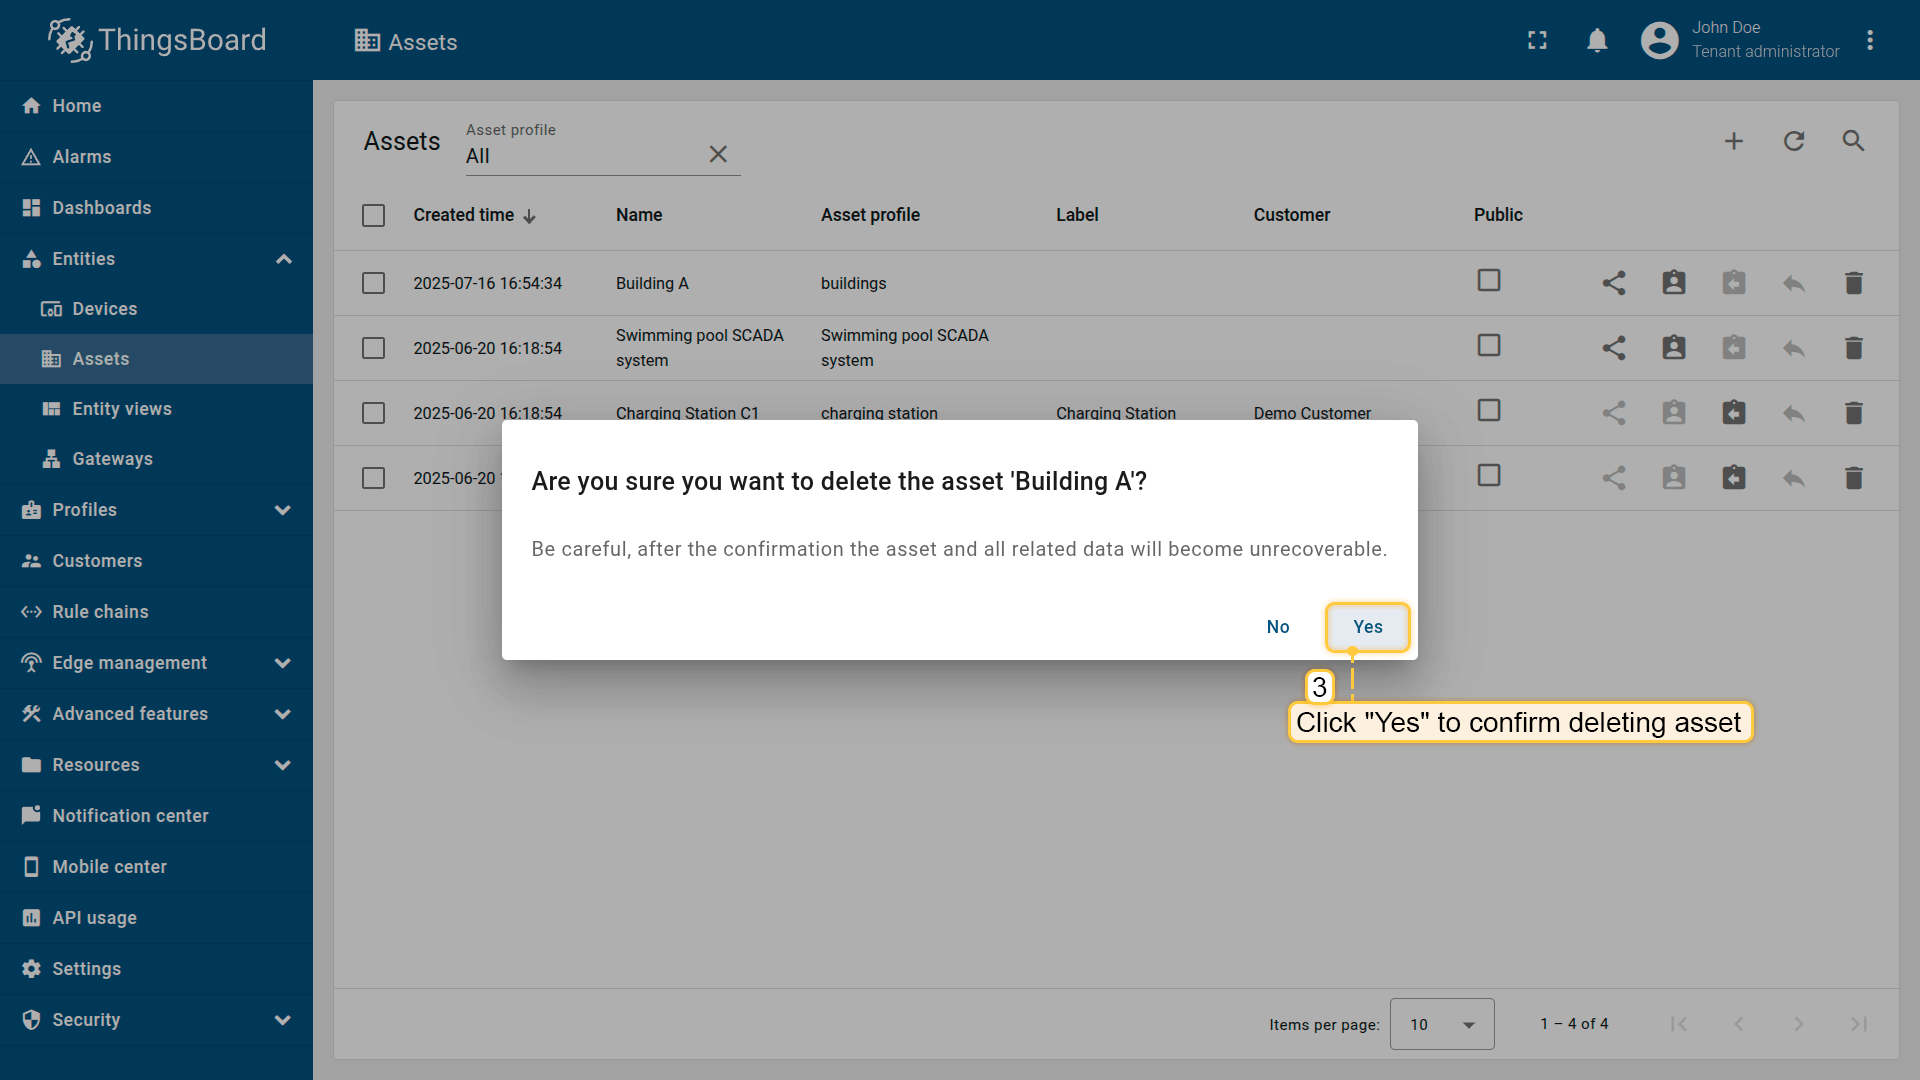
Note: Deleting an asset does not delete the devices or other entities linked to it, but it will break all existing relations (such as links to devices, alarms, dashboards, etc.).
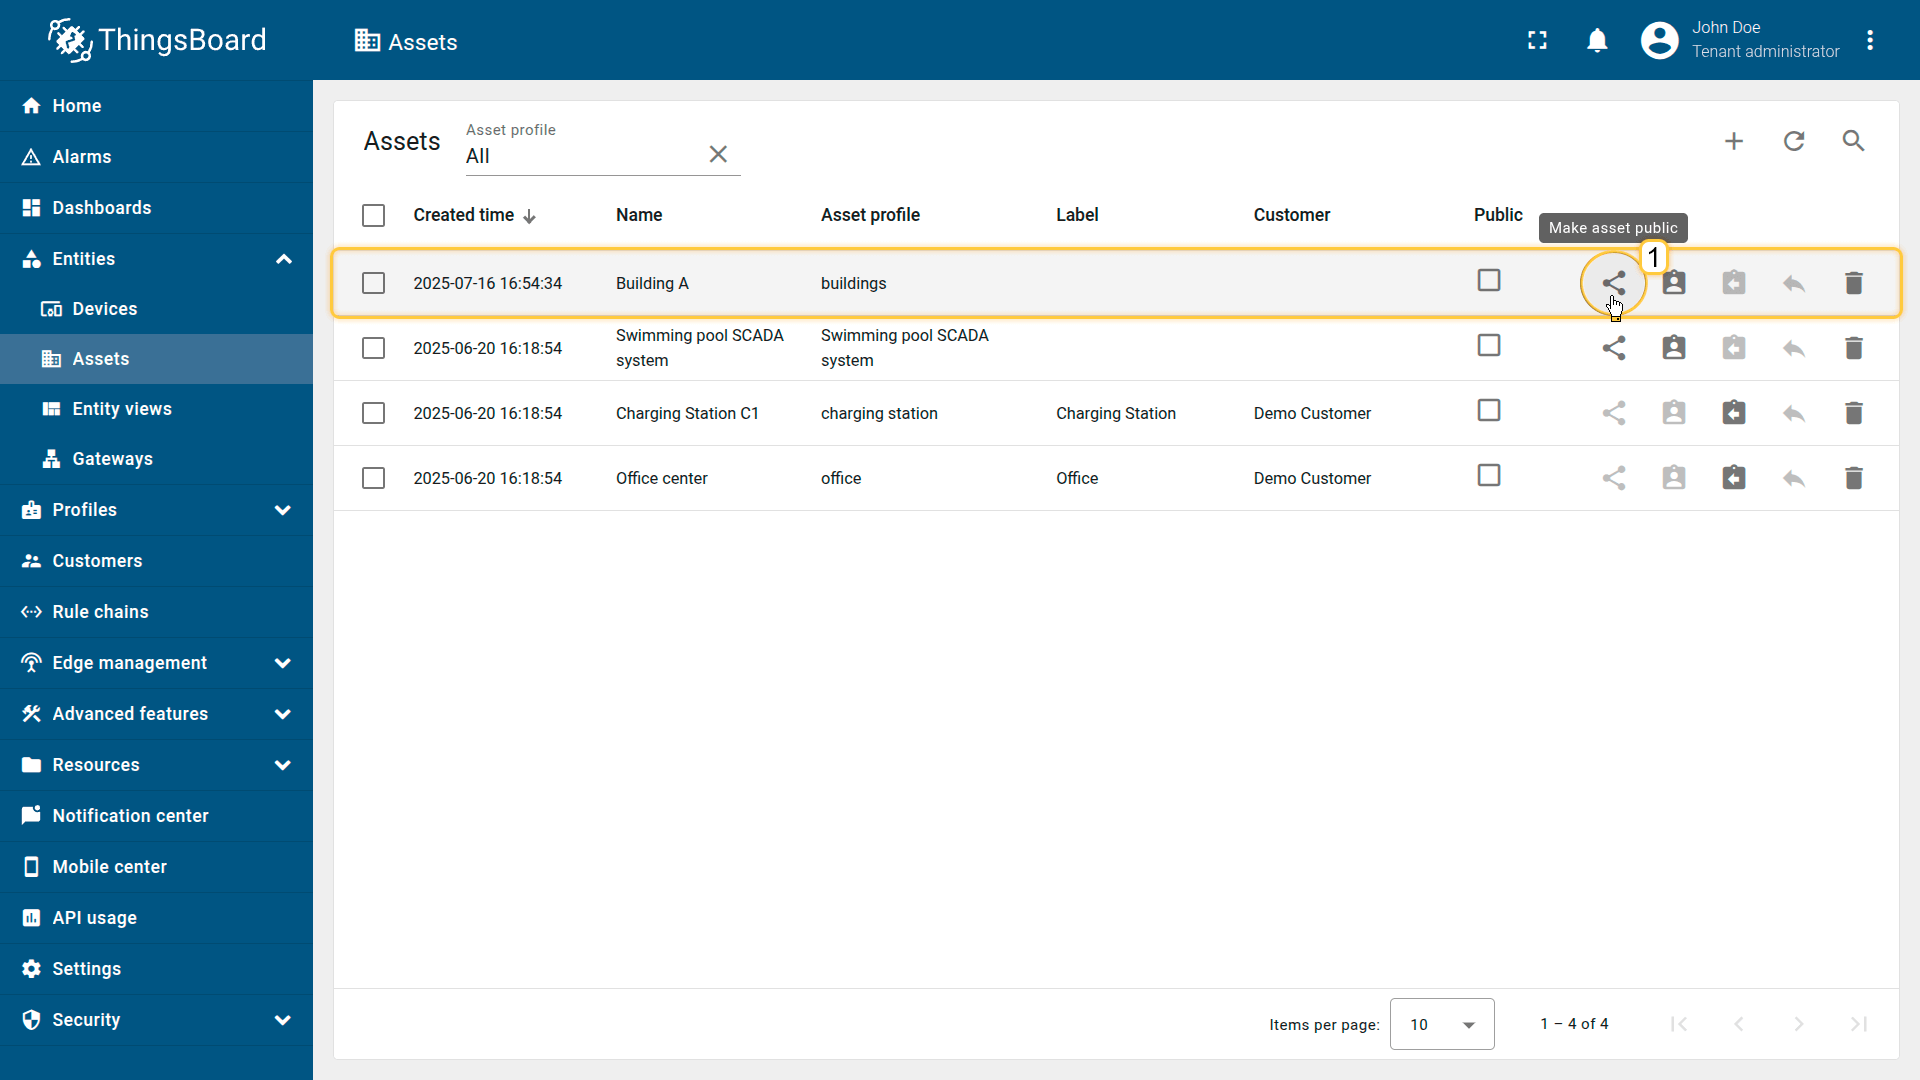
Make asset public
You can make an asset public so that all its data is accessible to everyone. This is ideal for creating public demo dashboards that require access to asset data or for open data use cases.
- Click the “Make asset public” icon next to the asset you want to share.
- Confirm your action in the popup dialog.
The asset is now public.


To revoke public access and make the asset private again:
- Click the "Make asset private" icon next to the asset.
- Confirm your action in the popup dialog.

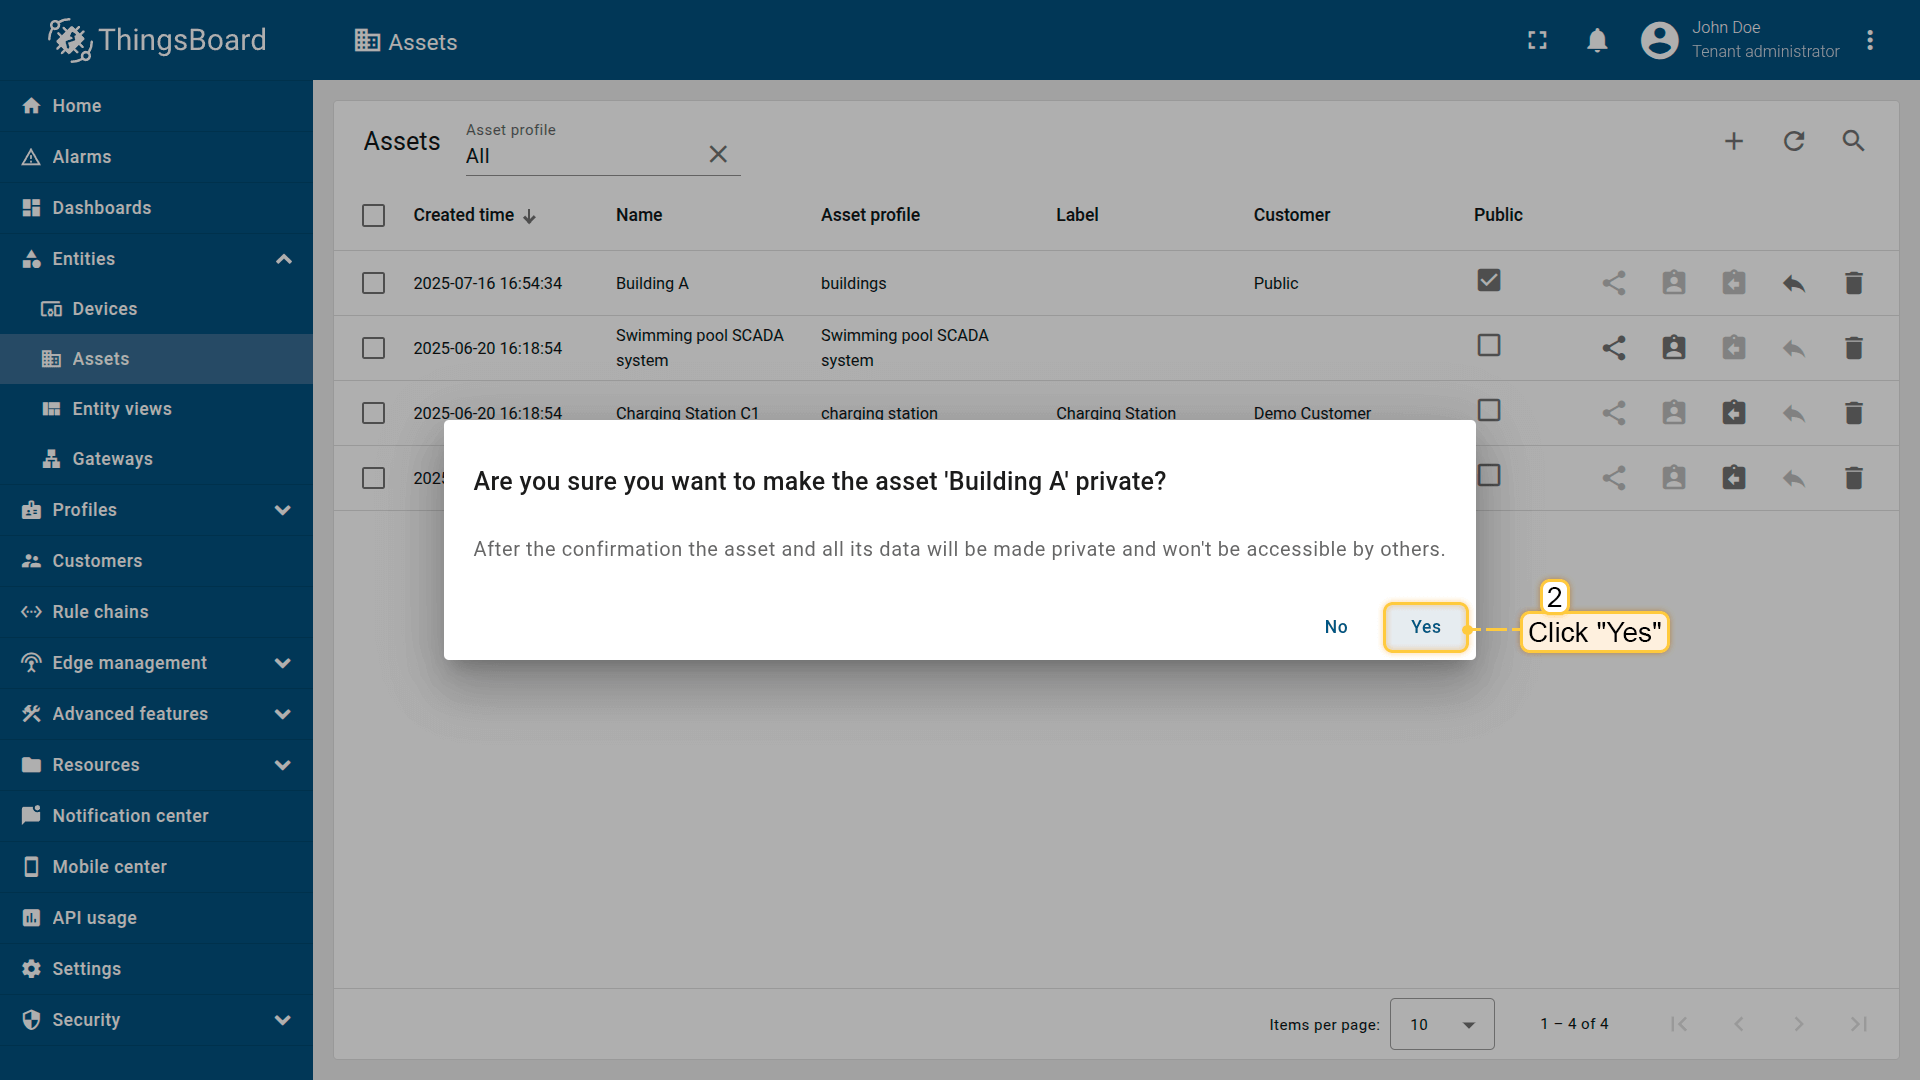
Once the asset is made private, it will no longer be publicly accessible, and any public dashboards referencing it will lose access to its data.
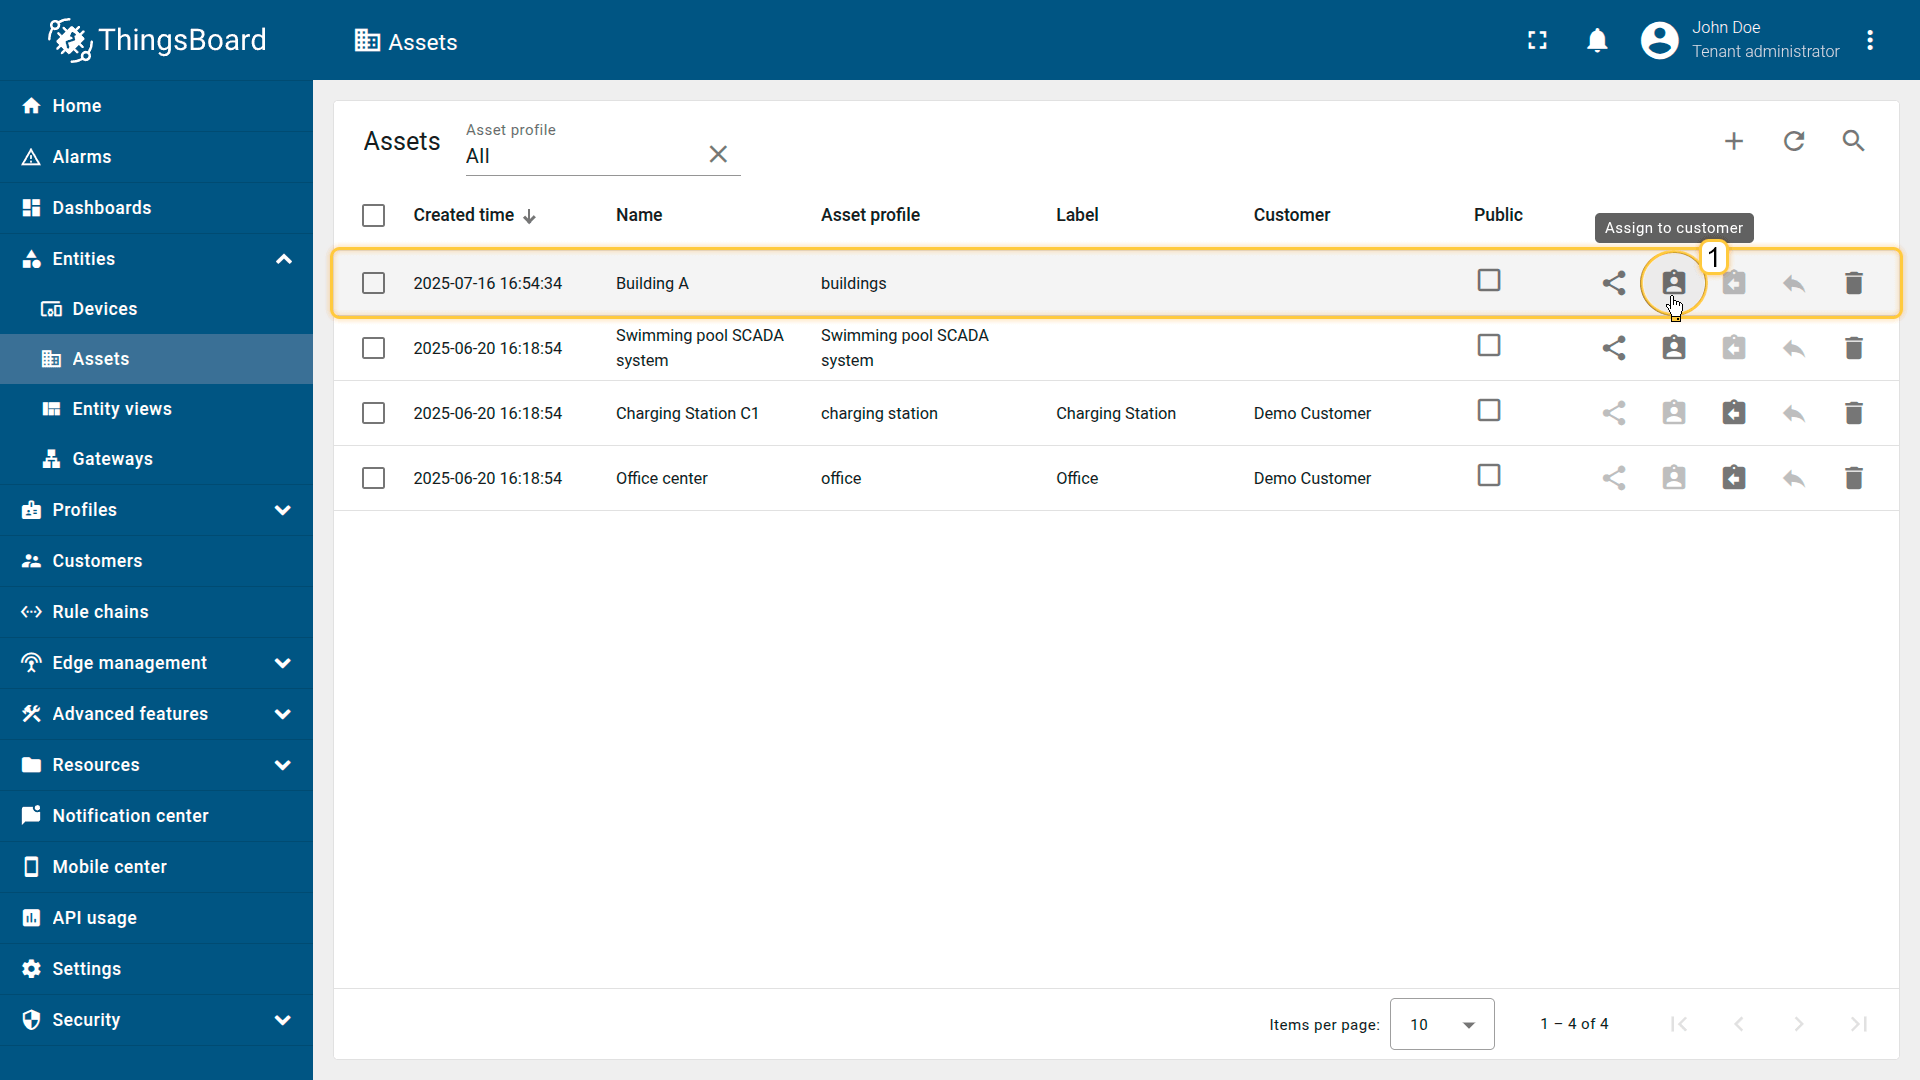
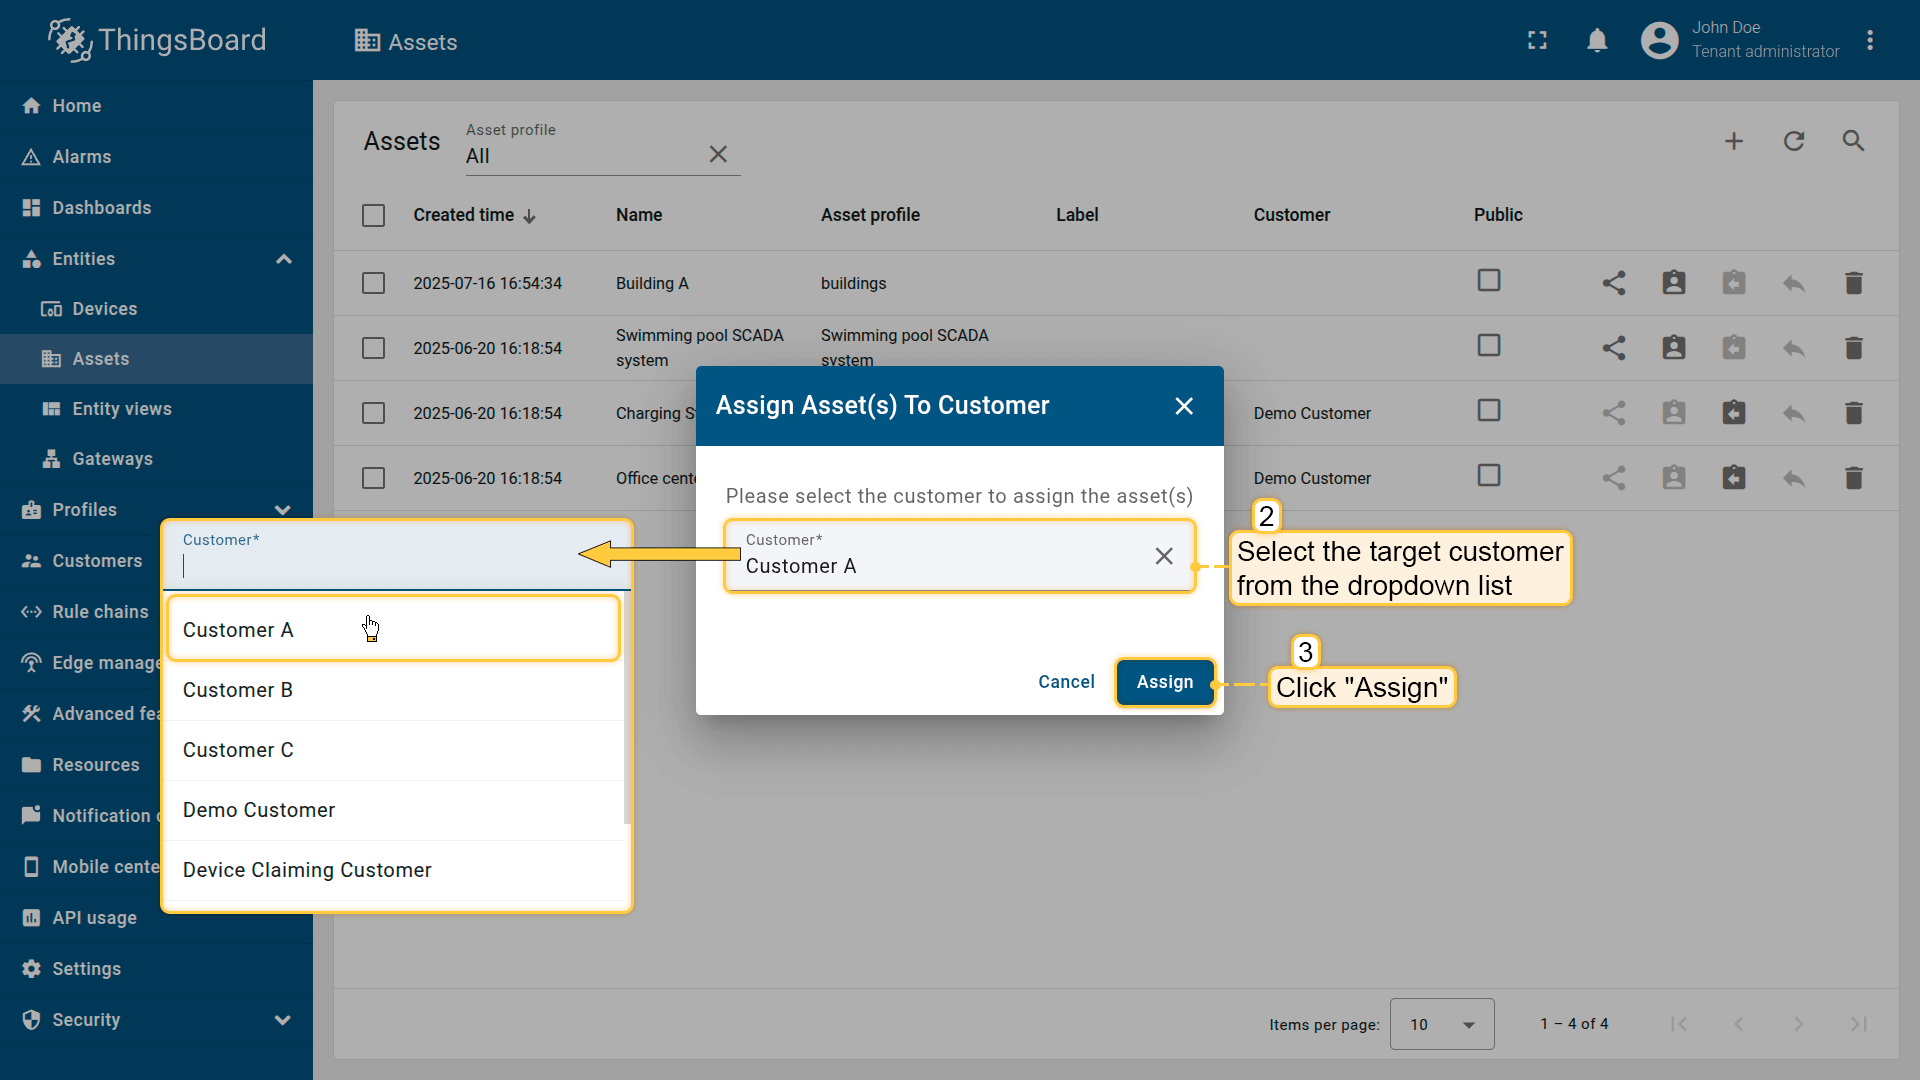
Assigning asset to customer
You can assign an asset to a specific customer. This ensures that only users associated with that customer will have access to the asset and its data.
This step is crucial for ensuring data access control. Each customer user will only see their own assets and will not have access to assets or data assigned to other customers.
To assign an asset to a customer:
- Locate the desired asset in the list.
- Click the “Assign to customer” icon.
- Select the target customer from the dropdown list.
- Click “Assign” to confirm the action.
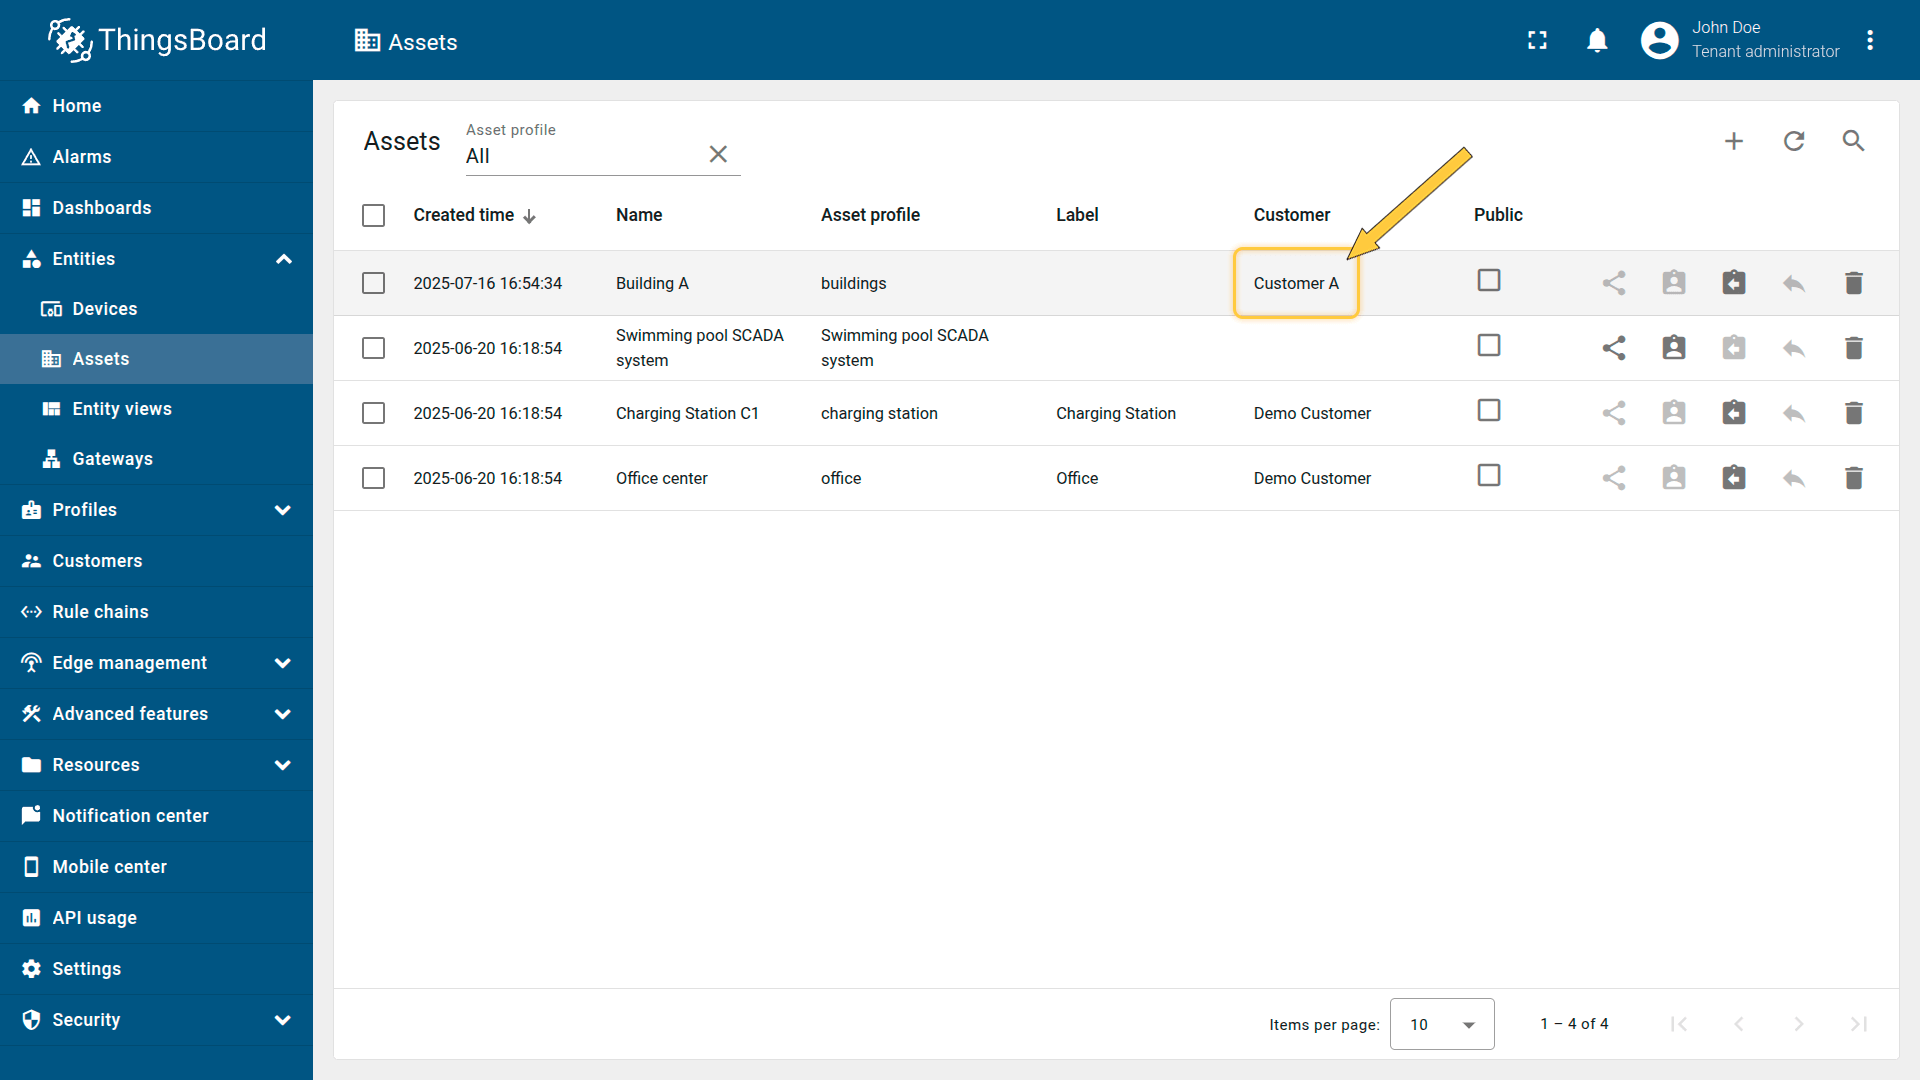
The selected customer now has access to the asset and its data.
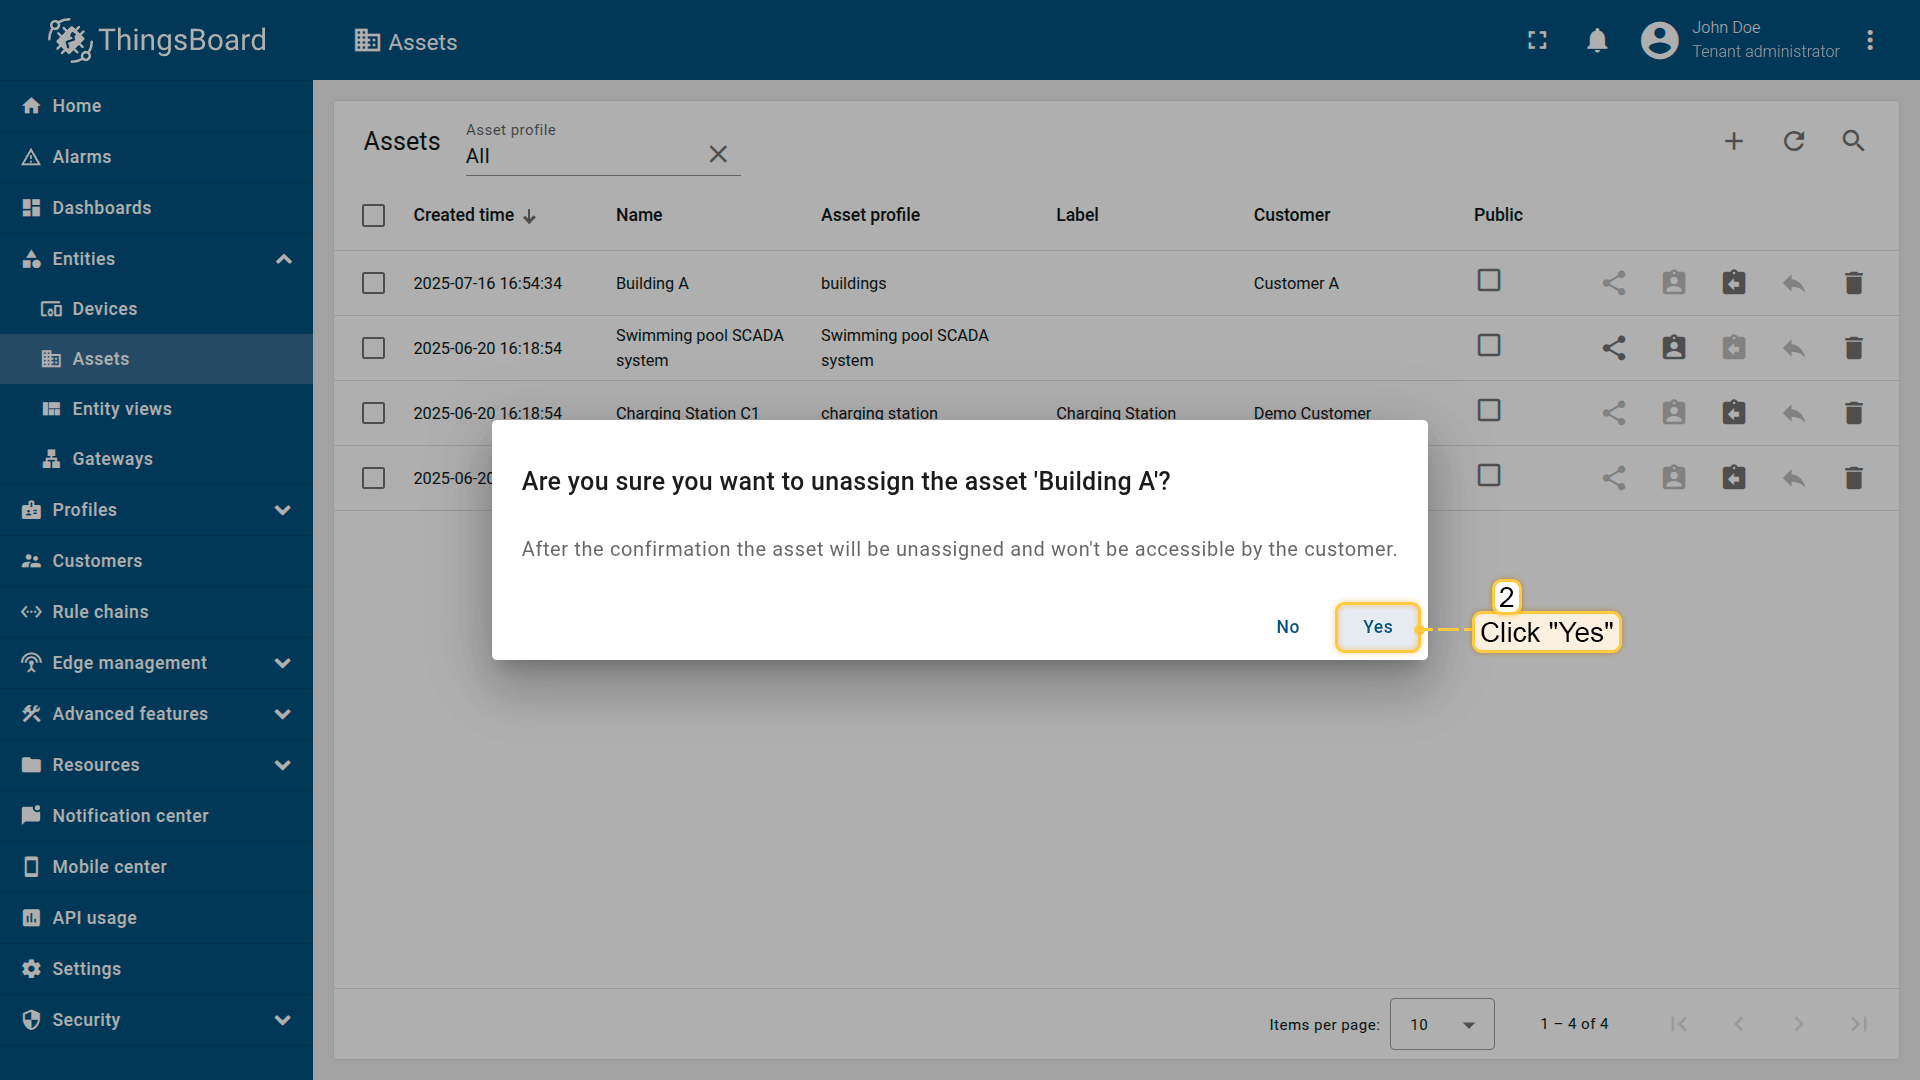
You can later unassign the asset or reassign it to another customer if needed.
- Click the "Unassign from customer" icon.
- Confirm your action in the popup dialog.

Asset details
Clicking on an asset opens a window where you can access and manage various aspects of that asset.
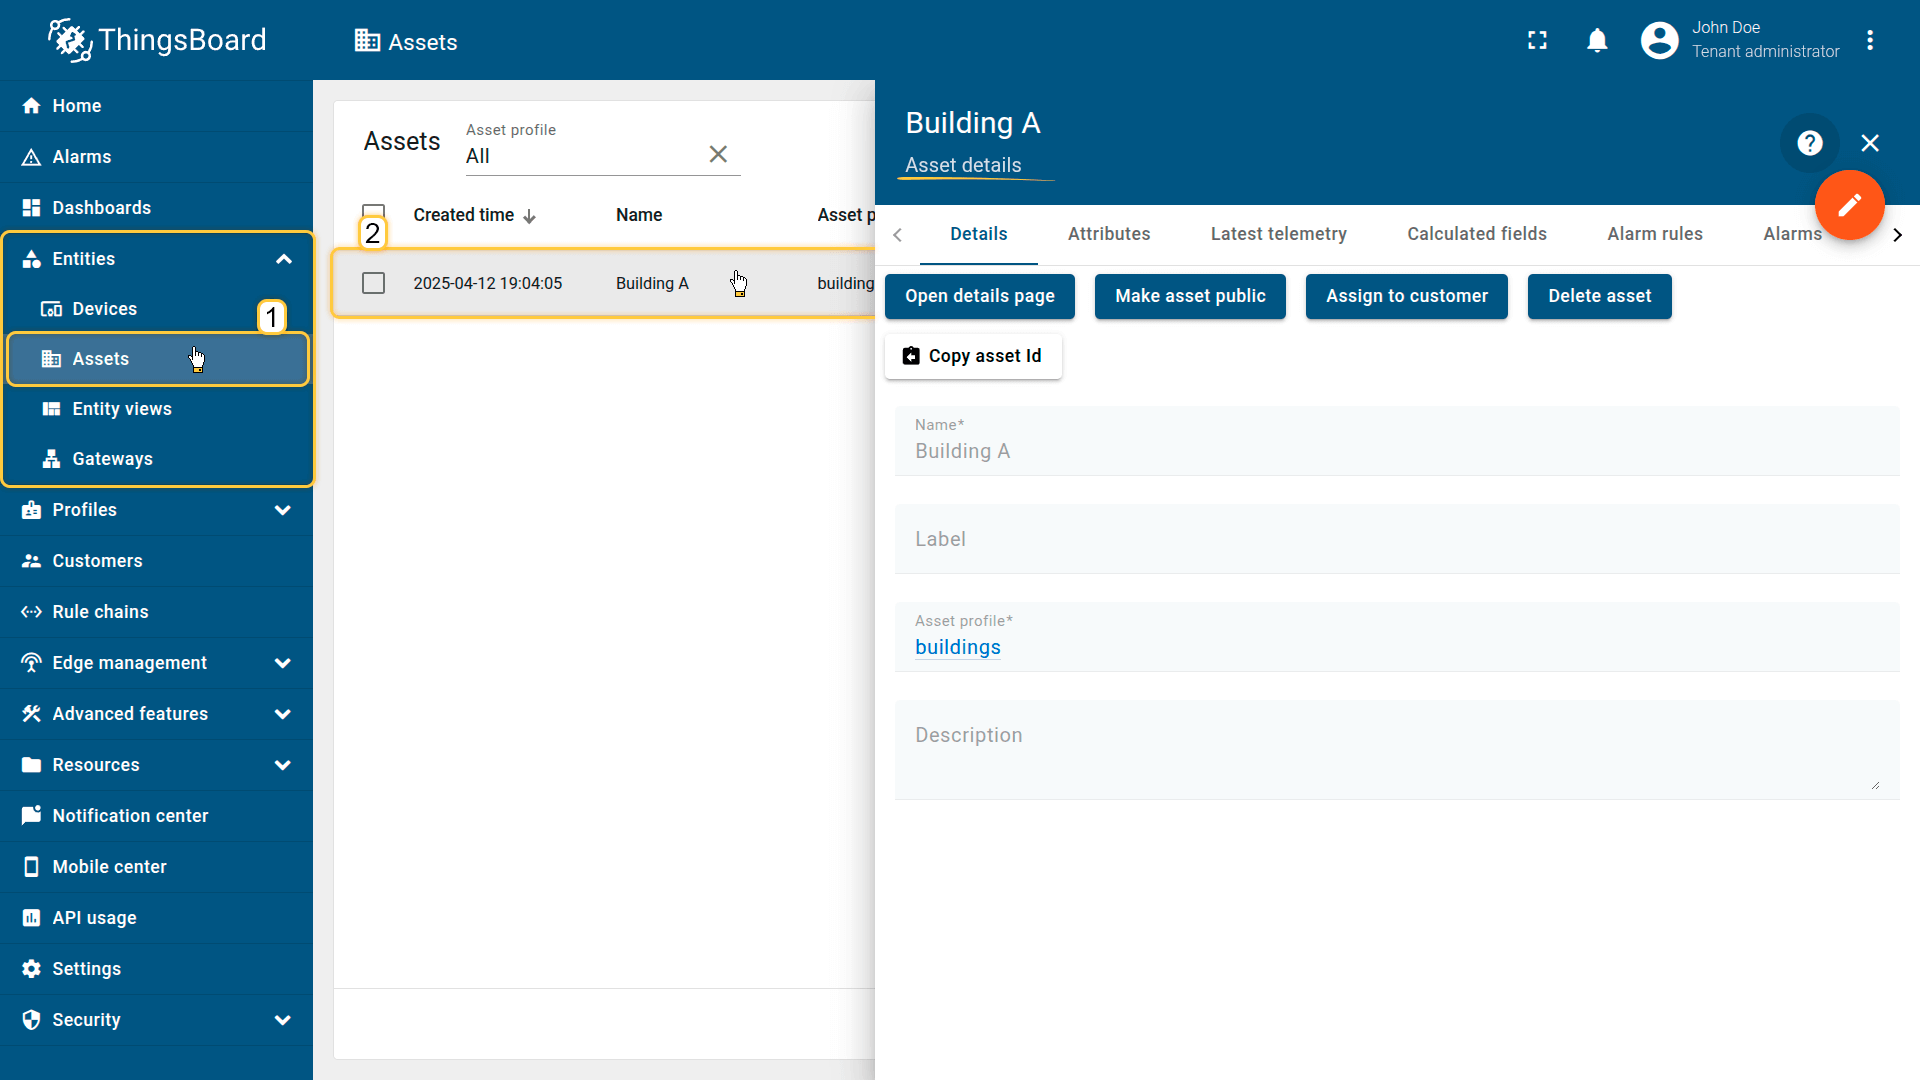
Copy asset ID
Allows you to quickly retrieve the asset’s unique UUID. Click Copy asset Id to copy it to your clipboard. The ID is used in API calls, integrations, and scripts.
Attributes
This tab displays client, server, and shared attributes — static or semi-static key-value pairs related to the asset. Examples include location, category, configuration parameters, and other metadata.
Latest telemetry
Shows the latest telemetry values associated with the asset. Telemetry may come from linked devices or be added manually for modeling purposes.
- Adding telemetry: Click the “+” icon, enter the key name, value type, and value.
- Deleting telemetry: Click the trash icon, choose the deletion mode (all data, latest value, all except latest, or by time period), and confirm.
Calculated fields
Displays fields whose values are computed from existing attributes or telemetry using formulas. This allows you to define derived parameters without modifying the device firmware. Learn more about Calculated fields here.
Alarm rules
Contains the alarm rules configured for the asset. You can review thresholds, triggering logic, and configured alarm actions that apply to this asset. Learn more about configuring alarm rules here.
Alarms
Shows all active and historical alarms related to the asset. Allows tracking of warnings, operational issues, and critical events affecting the asset.
Events
Displays system events associated with the asset, such as logs, warnings, errors, and other lifecycle-related activity. Useful for diagnostics and operational analysis.
Relations
Shows all directed relations between this asset and other entities, such as devices, dashboards, assets, and rule chains. Helps understand how the asset interacts within the system structure.
Audit logs
Provides a record of user actions related to the asset — creation, updates, configuration changes, and deletions. Used for auditing and change tracking.
Version control
Enables exporting and restoring asset-related entities using the Git-backed version control service. Supports backup, collaboration, and configuration versioning.
Managing asset relations. How to add, view, edit, delete
From the Assets page, you can create, view, edit, and delete relations between an asset and other entities (assets, devices, customers, etc.). See details about Entities and relations.
To manage relations between an asset and other entities for a specific asset:
- Open the asset details ➜ go to the Relations tab.
Add a new relation:
- In the Direction selector, choose From (outbound) or To (inbound).
- Click “+” icon (Add).
- In Add relation window, set Relation type (e.g., Contains, Manages) and choose the To entity (Entity type and target entities).
- Click Add to confirm.
Note: Relations are directional. Use “From” to define relations originating from the current asset, or “To” to show relations to this asset.
View & filter relations:
- Switch Direction between “From” and “To” to see outbound/inbound relations.
- Use the search icon to filter by relation type or entity.
Edit a relation:
- In the list, click the “pencil” icon to change the relation type or target entity, then Save.
Delete a relation:
- Click the “trash can” icon next to a relation and confirm deleting.
Note: Deleting a relation does not delete the related entities; it only deletes the relation.
Next steps
-
Connect your device - Learn how to connect devices based on your connectivity technology or solution.
-
Data visualization - These guides contain instructions on how to configure complex ThingsBoard dashboards.
-
Data processing & actions - Learn how to use ThingsBoard Rule Engine.
-
IoT Data analytics - Learn how to use rule engine to perform basic analytics tasks.
-
Advanced features - Learn about advanced ThingsBoard features.
-
Contribution and Development - Learn about contribution and development in ThingsBoard.
Your feedback
Don't hesitate to star ThingsBoard on github to help us spread the word. If you have any questions about this sample, please contact us.