- Create new customer
- Create customer user
- Edit customer
- Delete customer or customer user
- Customer details
- Next steps
- Your feedback
A Customer in ThingsBoard represents a distinct business entity — an individual or an organization — that purchases or uses a tenant's devices and/or assets. A customer may also represent a department or subdivision within the tenant's organization.
A customer user belongs to the customer and has read permissions to view dashboards and other entities assigned by the tenant administrator.
In Thingsboard Community Edition a customer user cannot create their own customers, users, or subcustomers.
Important:
In Thingsboard Professional Edition customer user can create other customers, users and subcustomers. To try this functionality, use the ThingsBoard Cloud server. The alternative option is to install ThingsBoard locally using this installation guide
Tenant administrators can create customer and can directly manage their assets, devices, dashboards, and edges from the customer details page by clicking the related tab.
Create new customer
The tenant administrator can add a new customer using the following steps.
- Navigate to the "Customers" page. Then click the plus sign in the upper right corner of the screen;
- In the opened dialog box, fill in the title of the customer. Also, you can optionally indicate country name, city, address, and phone number. Then click "Add";
- New customer is created. You can view and manage both users and entities (devices, assets, dashboards, etc.) for any customer directly from their row in the Customers table.


Create customer user
The tenant administrator can add a customer user using the following steps.
- Navigate to the "Customers" page. Then click on the "Manage customer users" icon located on the customer`s row to whom you want to add a customer user;
- Click the plus sign in the upper right corner of the screen. In the opened dialog box, enter the email address, first and last name of the user. Then choose activation method: display activation link or send activation link via email. Then click "Add";
- If you selected the option "Show activation link", copy the link address and send it to the user. Click "OK";
- New customer user is created.


Edit customer
The tenant administrator can edit the title, specify a home dashboard and edit the rest of the fields for the customer. Let’s see how to do this:
- Click on the customer to open their details. Click the "pencil" icon to enter edit mode;
- Edit the fields. For example, you can specify a home dashboard for this customer and all its customer users. After that, save all changes;
- You have updated customer information.


Also, you can edit customer user information.
The steps are similar to how we edit the customer:
- Click on the customer user to open their details. Click the "pencil" icon to enter edit mode;
- Edit the fields. For example, you can specify a customer`s phone number. After editing, save all changes;
- You have updated customer user information.


Delete customer or customer user
The tenant administrator can delete a customer along with all its customer users using one of the following ways:
First way:
- Click a trash icon can opposite the customer`s name you want to delete;
- Confirm deleting the customer in the dialog box.


Second way:
- Click on the customer that you want to delete. In the customer details, click "Delete customer" button;
- Confirm deleting the customer in the dialog box.


You can also delete multiple customers at once.
- Mark one or multiple customers you want to delete. Click on the trash bin icon in the top right corner;
- Confirm deleting customers in the dialog box.


Also, you can delete any customer user from the customer. The steps are the same as when deleting a customer.
- Navigate to the "Customers" page. Then click on the "Manage customer users" icon located on the customer`s row whose customer user you want to delete;
- Click a trash icon can opposite the name of the customer user you want to delete. Confirm deleting the customer user in the dialog box.


Customer details
Clicking on a customer opens a details window where you can view and manage all aspects related to that customer.
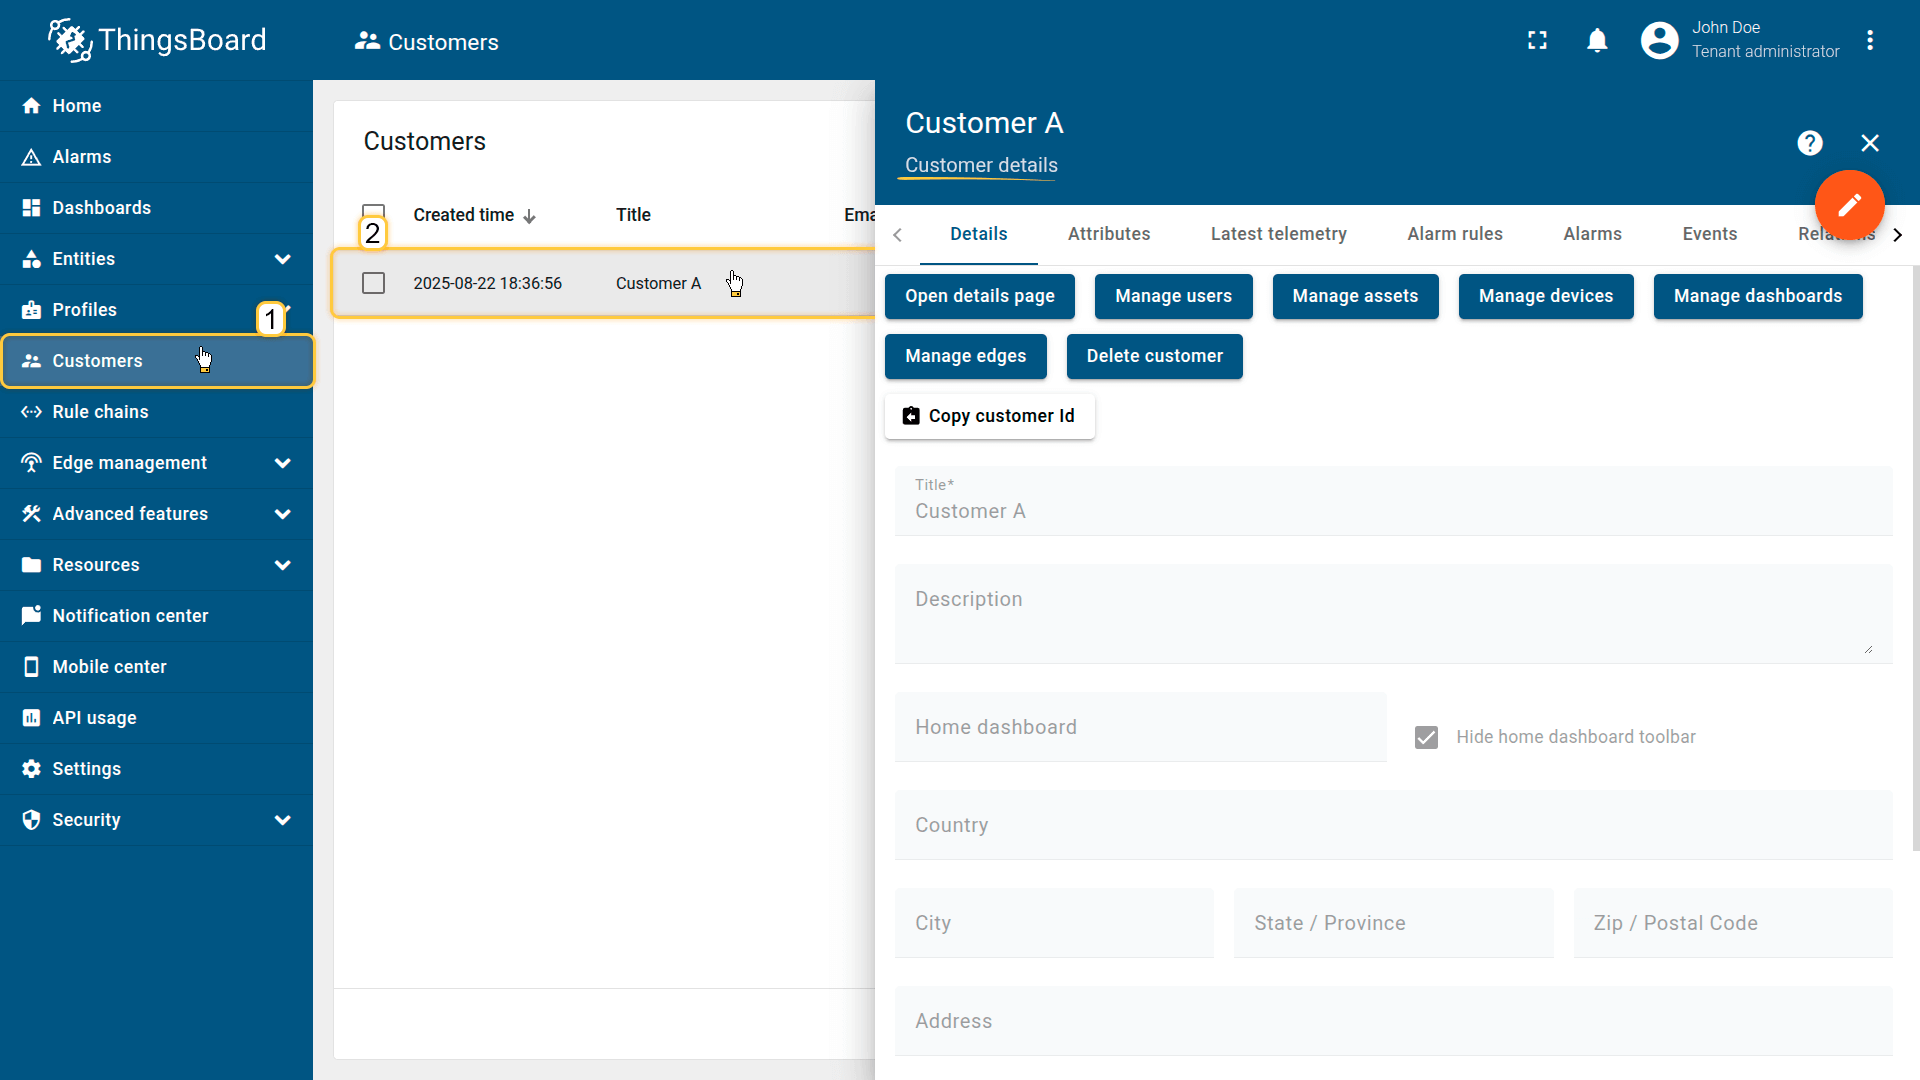
Copy customer ID
Allows you to quickly retrieve the customer’s unique UUID. Click Copy customer Id to copy it to your clipboard. This ID is used in API calls, integrations, and automation scripts.
Attributes
This tab displays client, server, and shared attributes associated with the customer. These are static or semi-static key-value pairs, such as contact information, region, account parameters, or custom metadata.
Latest telemetry
Shows the latest telemetry values linked to the customer. Telemetry can be generated by customer-related devices, services, or added manually for analytics and modeling purposes.
- Adding telemetry: Click the “+” icon, then define the key, value type, and value.
- Deleting telemetry: Click the trash icon, select the deletion mode (all data, latest value, all except latest, or by time range), and confirm the action.
Calculated fields
Displays fields whose values are computed from existing attributes or telemetry using formulas. Useful for deriving additional business metrics at the customer level. Learn more about Calculated fields here.
Alarm rules
Contains alarm rules configured for the customer. These rules define how alarms are generated based on customer-level data or associated assets/devices. Learn more about configuring alarm rules here.
Alarms
Shows all active and historical alarms related to the customer. Helps track operational issues, warnings, and critical events affecting the customer or their infrastructure.
Events
Displays system events associated with the customer — logs, warnings, errors, and lifecycle activities. Useful for diagnostics and monitoring customer-related operations.
Relations
Shows all directed relationships between the customer and other entities, such as assets, devices, dashboards, or rule chains. Provides a structural overview of the customer’s environment in the system.
Audit logs
Provides a record of user actions related to the customer — creation, updates, configuration changes, and deletions. Supports security auditing and change tracking.
Version control
Allows exporting and restoring customer-related entities using the Git-based version control service. Useful for backups, collaborative workflows, and configuration versioning.
Next steps
-
Connect your device - Learn how to connect devices based on your connectivity technology or solution.
-
Data visualization - These guides contain instructions on how to configure complex ThingsBoard dashboards.
-
Data processing & actions - Learn how to use ThingsBoard Rule Engine.
-
IoT Data analytics - Learn how to use rule engine to perform basic analytics tasks.
-
Advanced features - Learn about advanced ThingsBoard features.
-
Contribution and Development - Learn about contribution and development in ThingsBoard.
Your feedback
Don't hesitate to star ThingsBoard on github to help us spread the word. If you have any questions about this sample, please contact us.